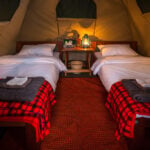
AN FAQ ON ENKISHUI MARA CAMP
2 December 2024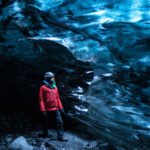
HOW TO PHOTOGRAPH IN COLD ENVIRONMENTS
3 December 2024AN FAQ ON ENKISHUI MARA CAMP
2 December 2024HOW TO PHOTOGRAPH IN COLD ENVIRONMENTS
3 December 2024PHOTOGRAPHY TIPS
HOW TO: SPOTLIGHT PHOTOGRAPHY
We all know that unlocking the mysteries of wild creatures through the use of lens/cameras is a thrilling adventure that every wildlife photography enthusiast craves. In the realm of nocturnal creatures, capturing their elusive beauty requires a different set of skills and tools. This can be a challenging yet rewarding endeavour. Proper planning, equipment, and techniques are crucial to capture compelling and ethically responsible wildlife images.
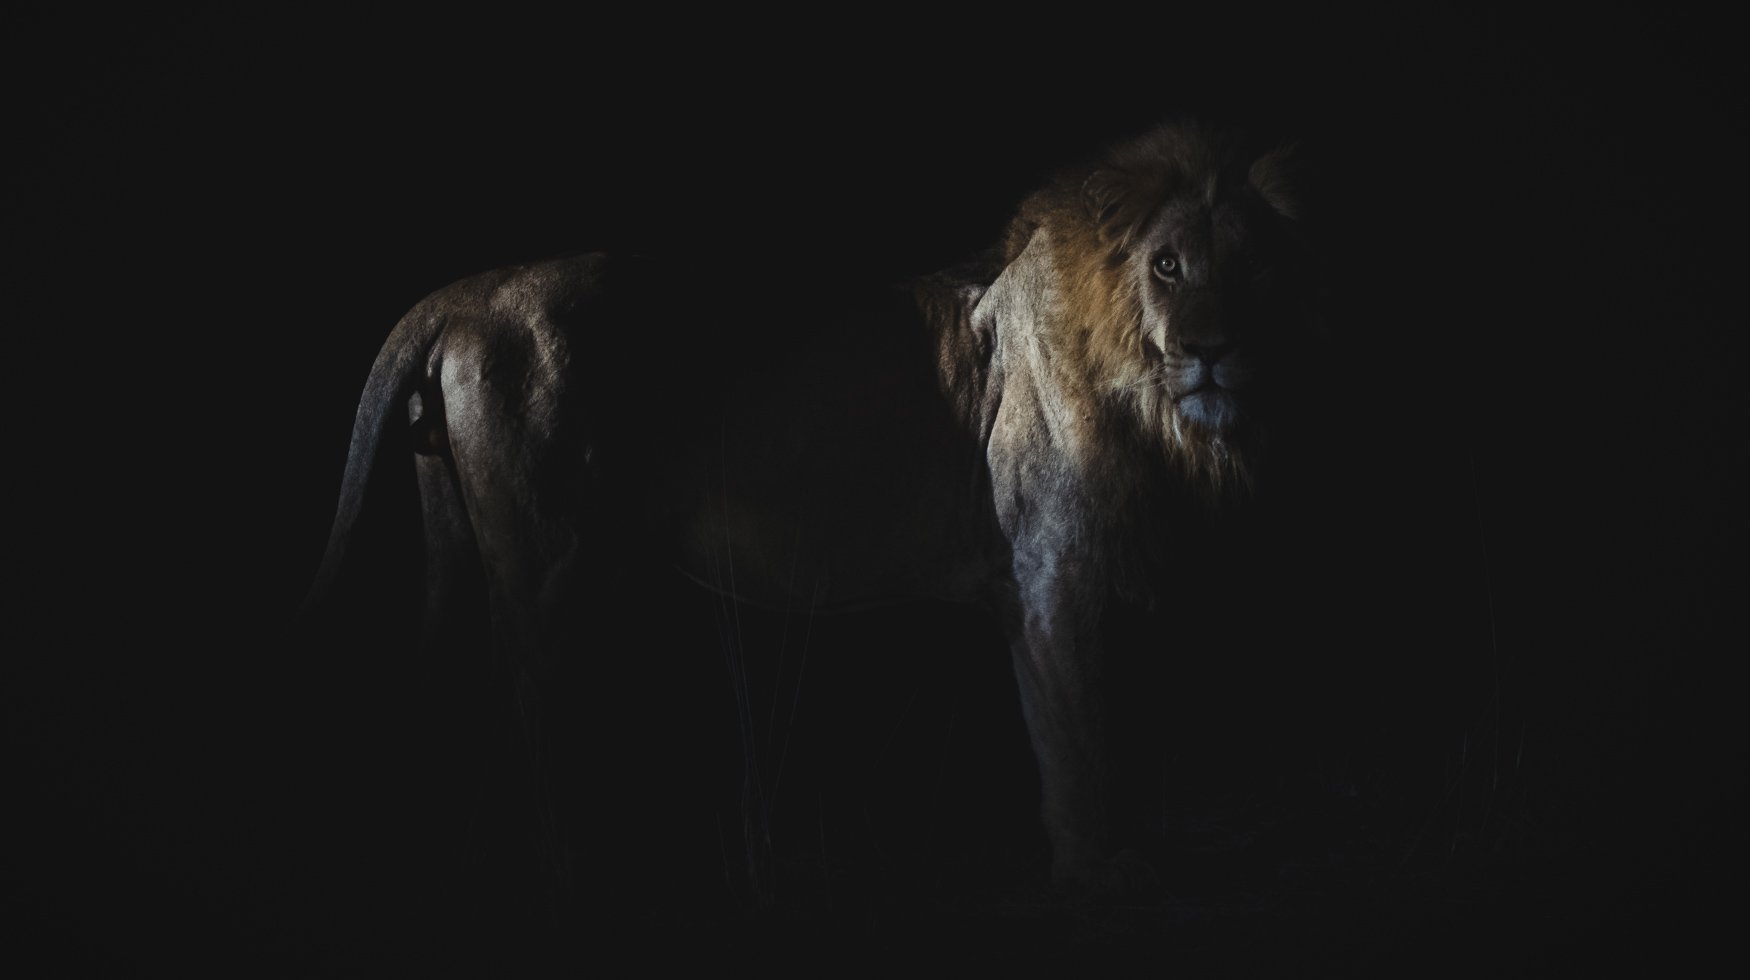
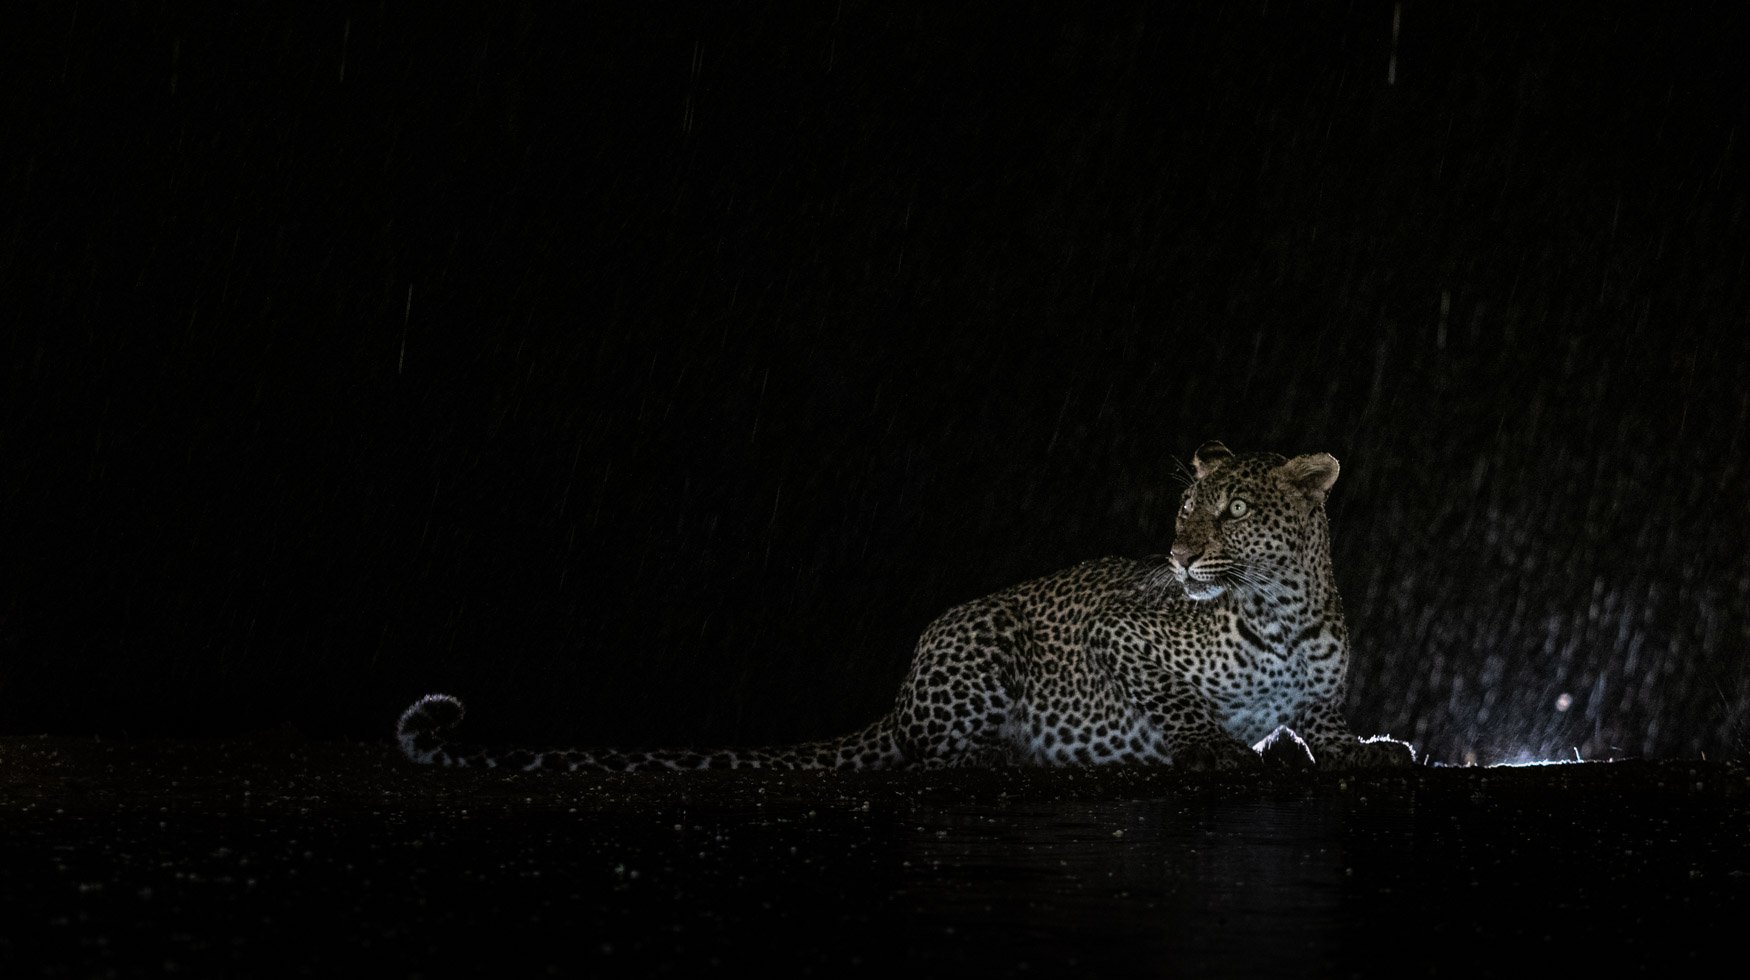
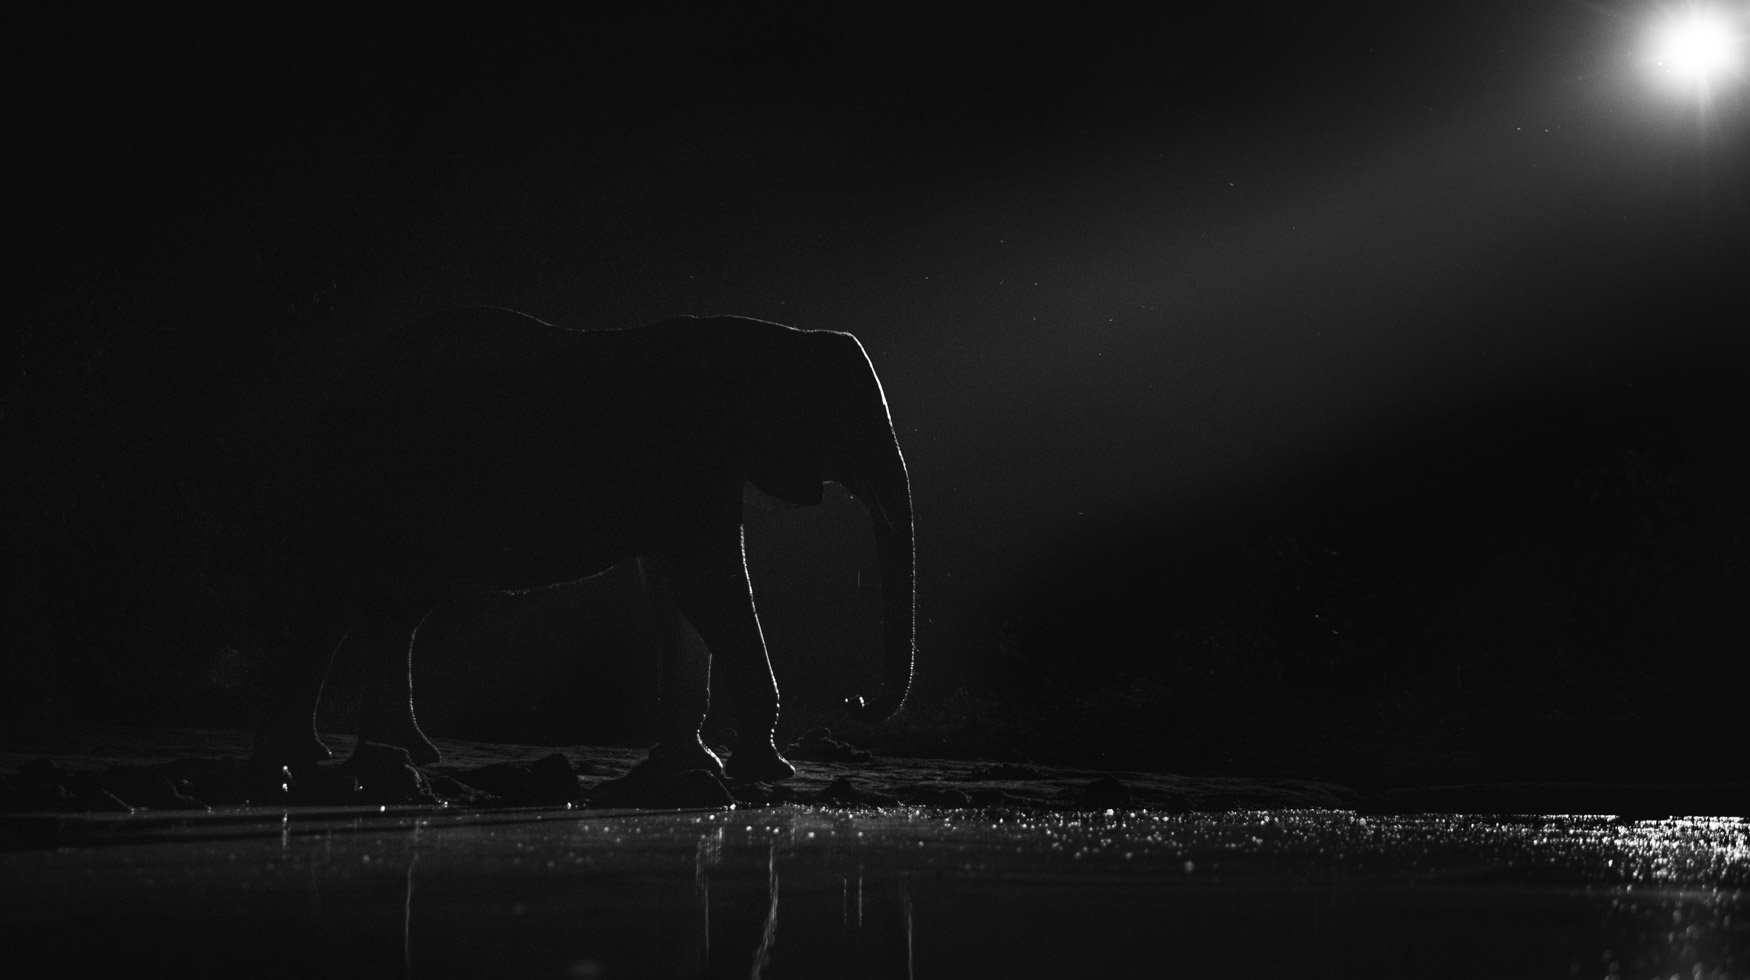
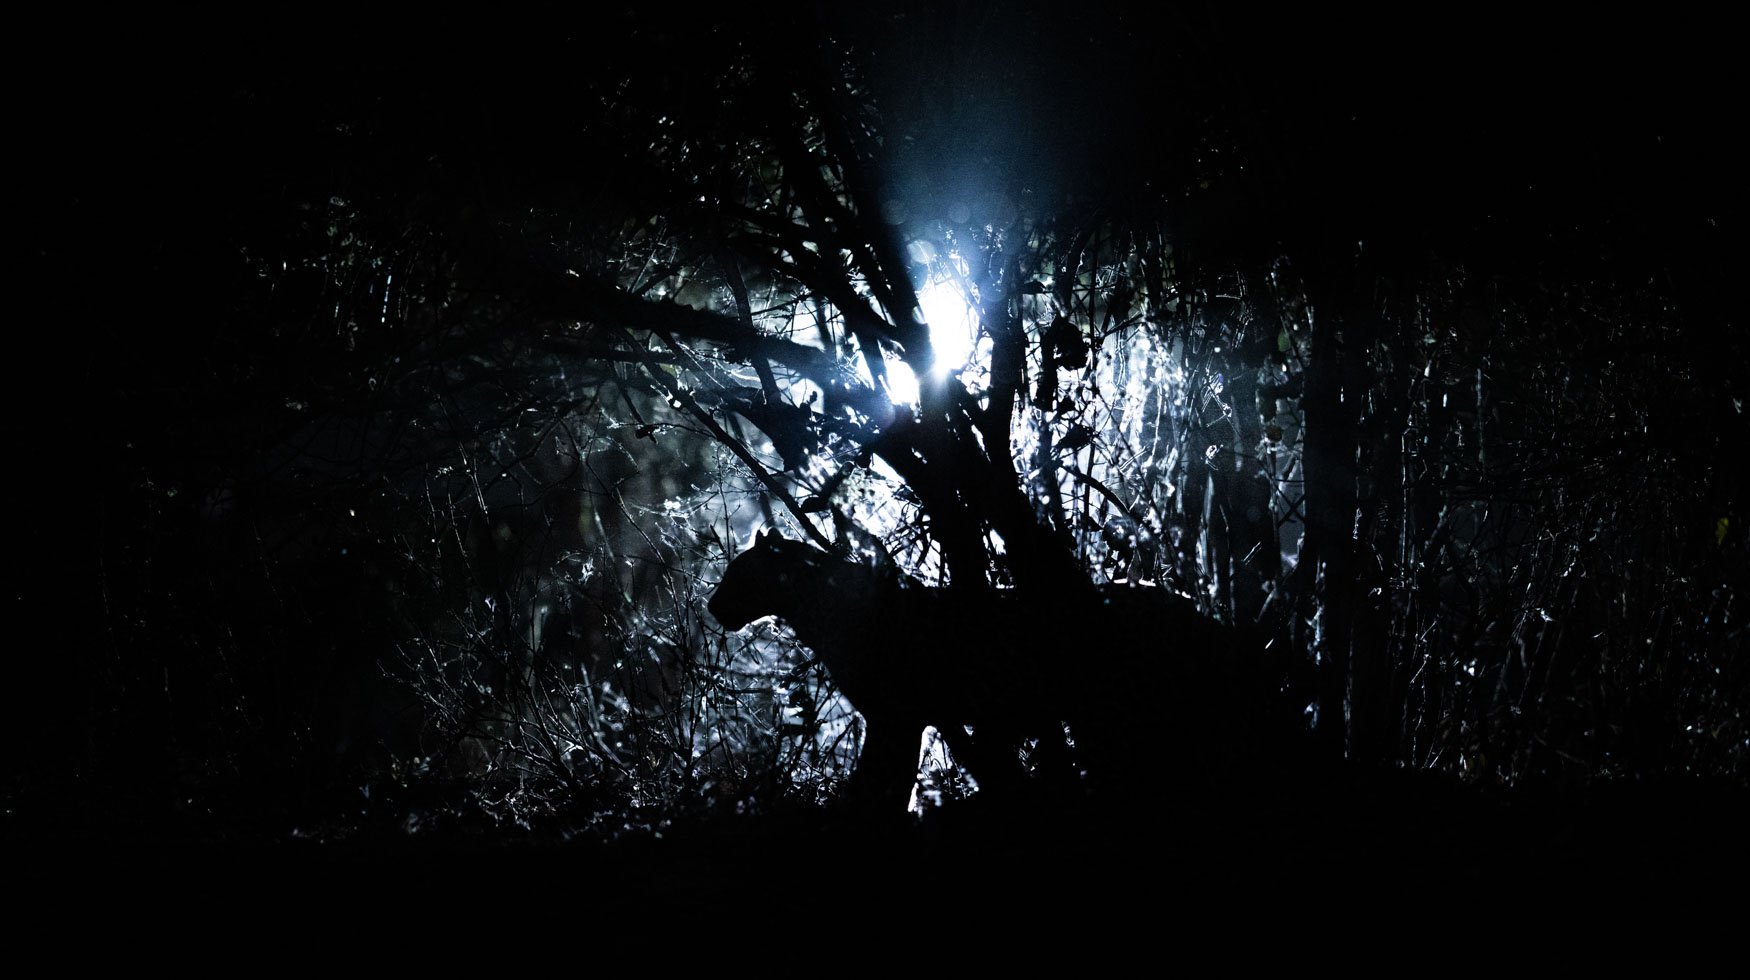
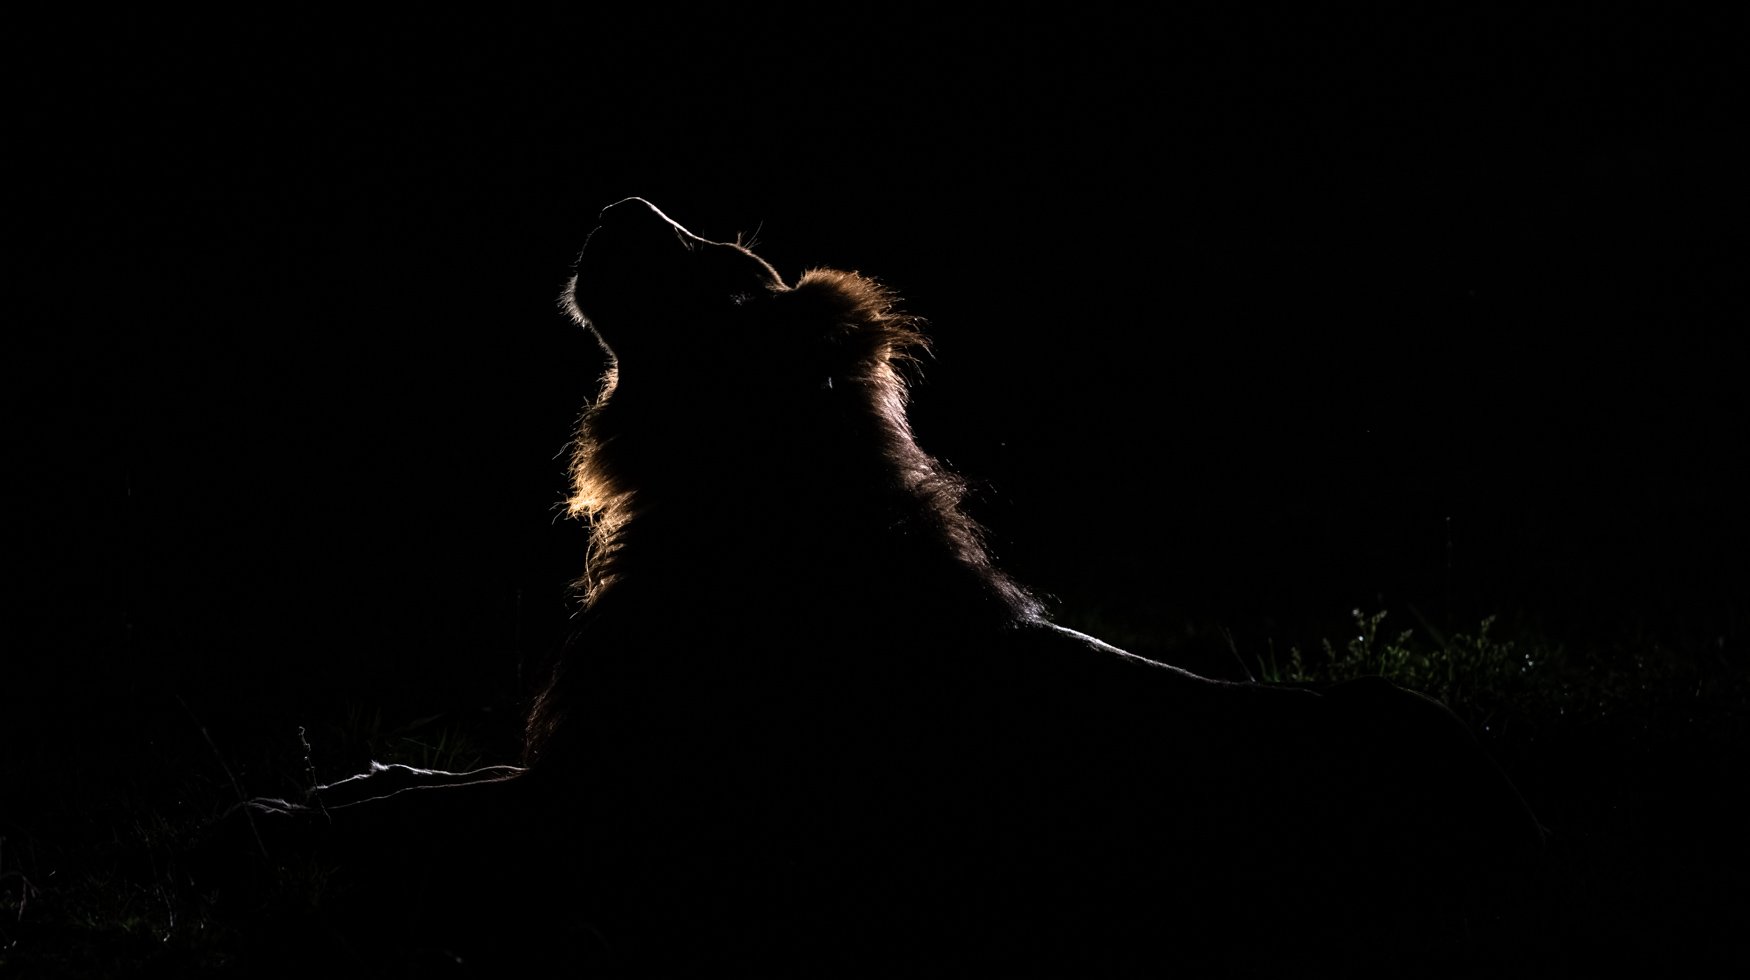
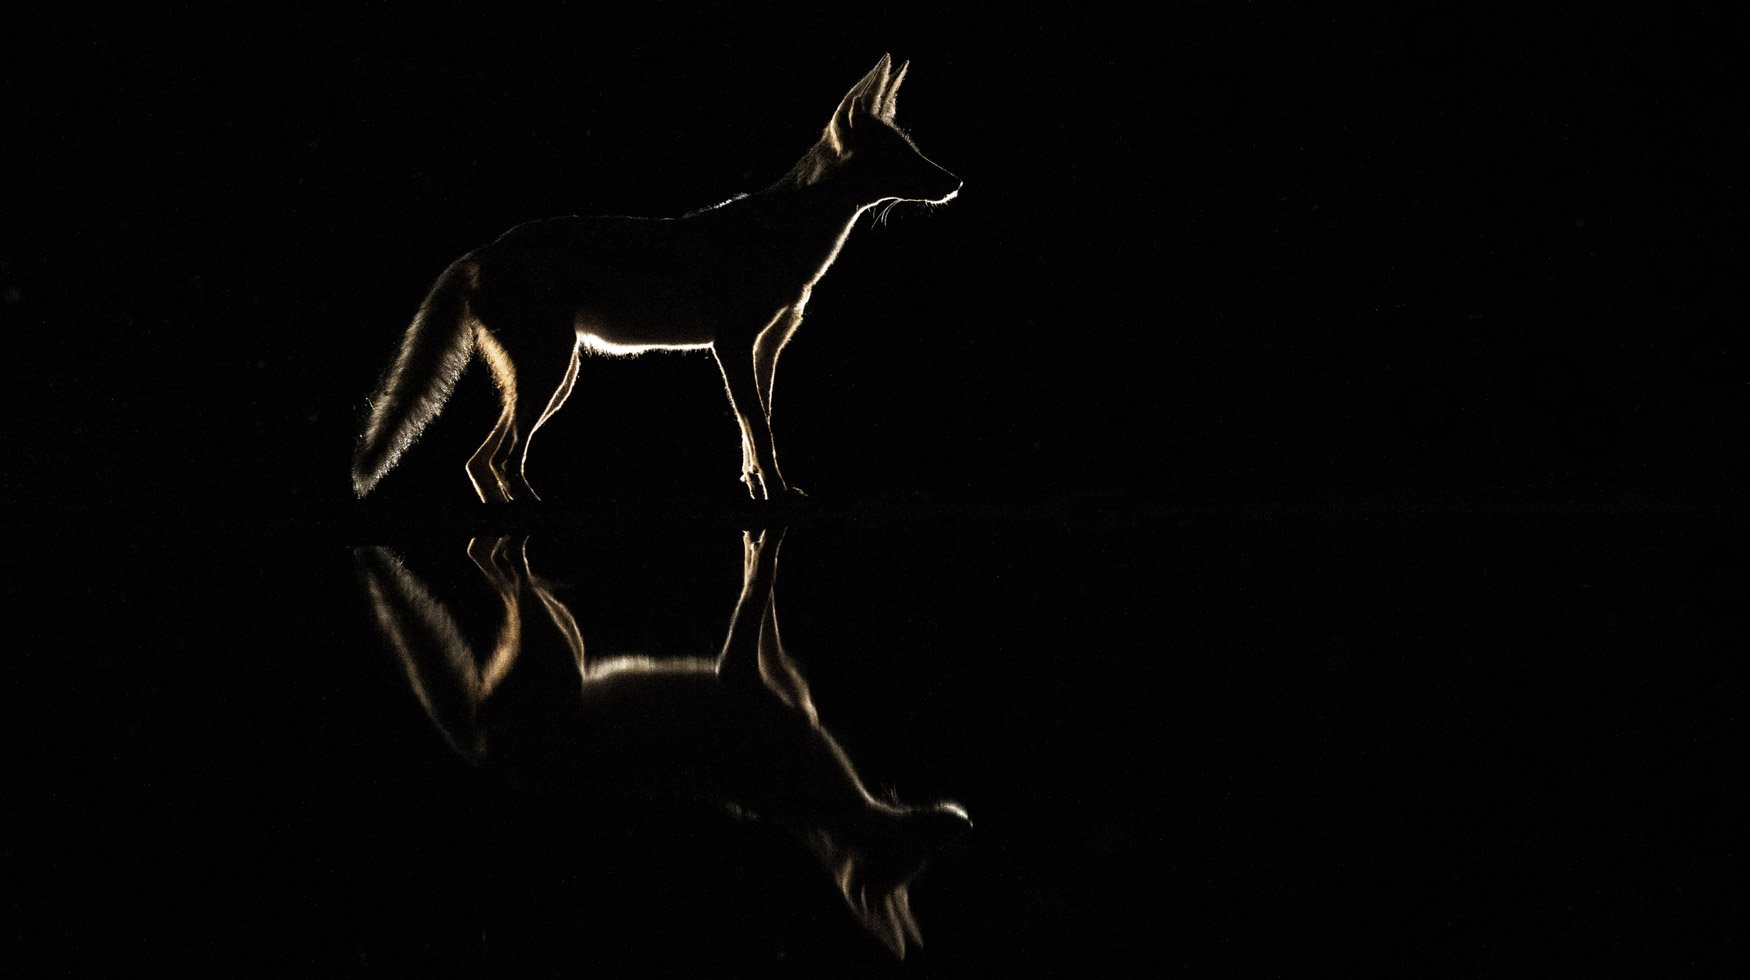
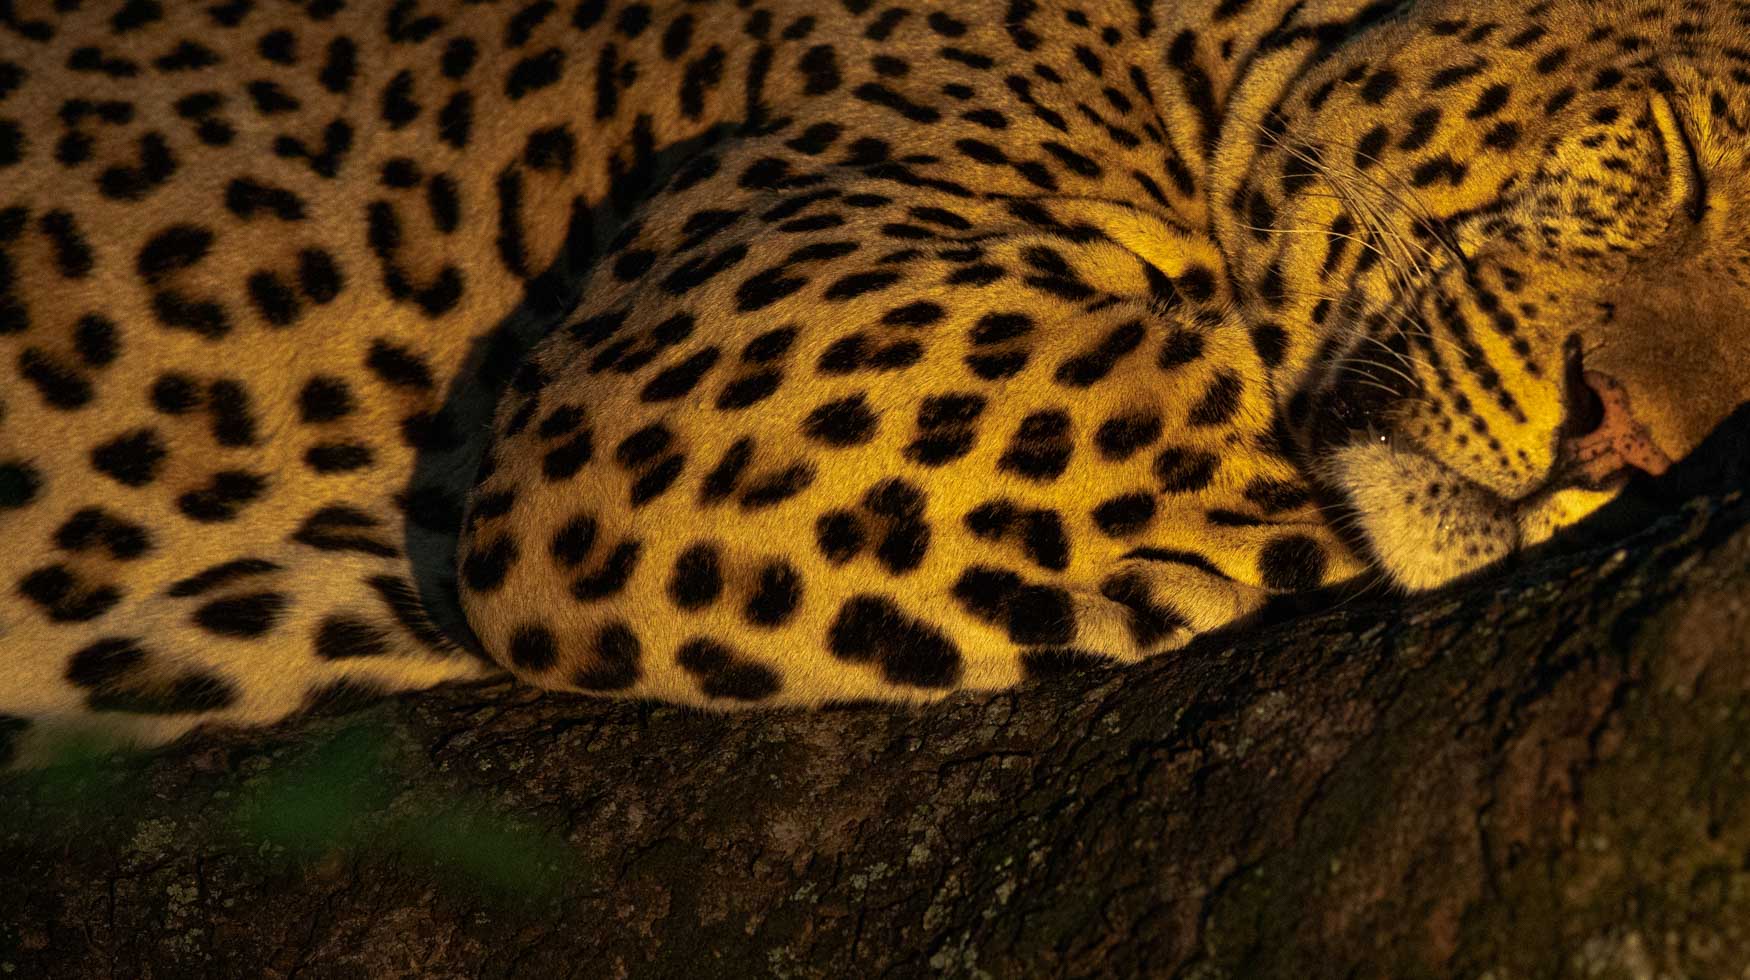
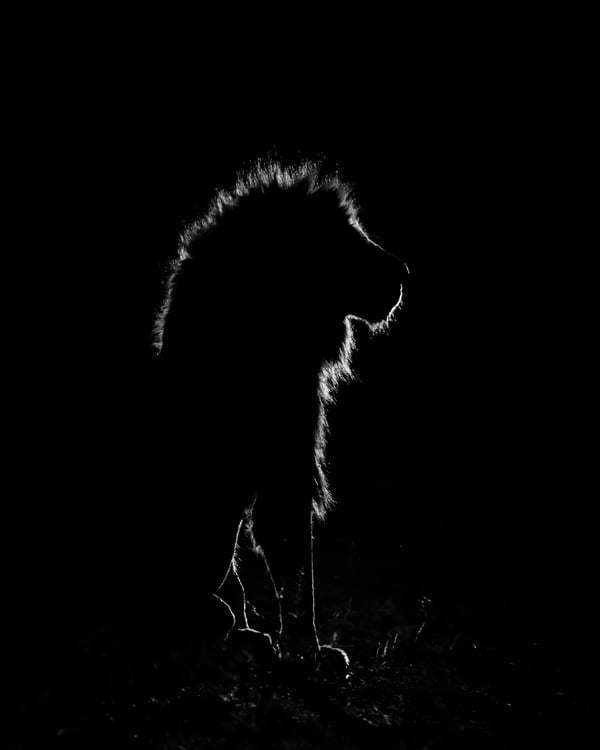
One of the most compelling advantages of using a spotlight for nighttime photography lies in the realm of creative lighting effects. The controlled illumination provided by a spotlight allows photographers to sculpt and shape the scene, turning a nocturnal setting into a canvas of dramatic visual storytelling.
- Dynamic composition.
- Directional drama.
- Play with shadows.
- Subject isolation
- Enhancing textures and details.
- Creating contrast.
- Expressive portraits.
Allow me to take you on an illuminating journey as we delve into the art of wildlife photography using a spotlight. In this blog, we'll explore the techniques, gear, and tips that will help you navigate the darkness and unveil the mesmerising world of wildlife after the sun sets.
Here's a guide to help you photograph wildlife using spotlights:
Choose the Right Equipment
Camera
Low-light Performance:
Opt for a camera with excellent low-light performance, as this is crucial for capturing clear and detailed images in the dark. Cameras with larger sensors, such as full-frame DSLRs or mirrorless cameras, tend to perform better in low-light conditions by allowing more light to hit the sensor.
High ISO Capabilities:
Choose a camera with high ISO capabilities. Higher ISO settings enable you to capture images in low-light situations without sacrificing shutter speed. Look for a camera that produces minimal noise at elevated ISO levels, ensuring clean and sharp images.
Autofocus Performance:
Consider a camera with reliable autofocus performance in low light. Some cameras offer advanced autofocus systems specifically designed for low-light conditions, helping you achieve accurate and quick focus even when using a spotlight.
In-body Image Stabilisation (IBIS):
In-body image stabilization can be beneficial, especially if you are using lenses without built-in stabilization. This feature compensates for handheld camera movements, resulting in sharper images during longer exposures.
Lens
Wide Aperture:
Select a lens with a wide aperture (small f-number), such as f/2.8 or wider. A wide aperture allows more light to enter the lens, making it easier to capture well-exposed images in low-light conditions. Zoomable lenses with fixed apertures through out its range will be my go to. Something like the f/2.8 70-200mm will be a great candidate for the job due to the wide aperture and its ability to zoom.
Prime Lenses:
Prime lenses, which have a fixed focal length, are often preferred for their optical quality and wide apertures. These lenses are excellent for capturing sharp and detailed images in low light, making them ideal for nighttime wildlife photography. Additionally, prime lenses are generally more compact and lightweight, making them easier to carry during outdoor expeditions but you will lose the flexibility to zoom in or out.
Image Quality:
Consider lenses known for their superior image quality, especially in low-light scenarios. Look for lenses with good optical elements and coatings that minimize aberrations, ghosting, and flare. High-quality glass contributes to sharper images and better overall performance.
Focusing Capabilities:
Ensure that the lens has reliable autofocus capabilities, especially in low-light conditions. Some lenses are equipped with fast and accurate autofocus systems that work well even in challenging lighting situations, allowing you to capture elusive wildlife moments with precision.
That all said, Please do not run out the door now to go buy the latest and greatest. I always say, the best gear to have is the gear with you. Rather push yourself and your gears capabilities to its max as this is the best way to learn. Once mastered and you still want to better your work, then go buy.
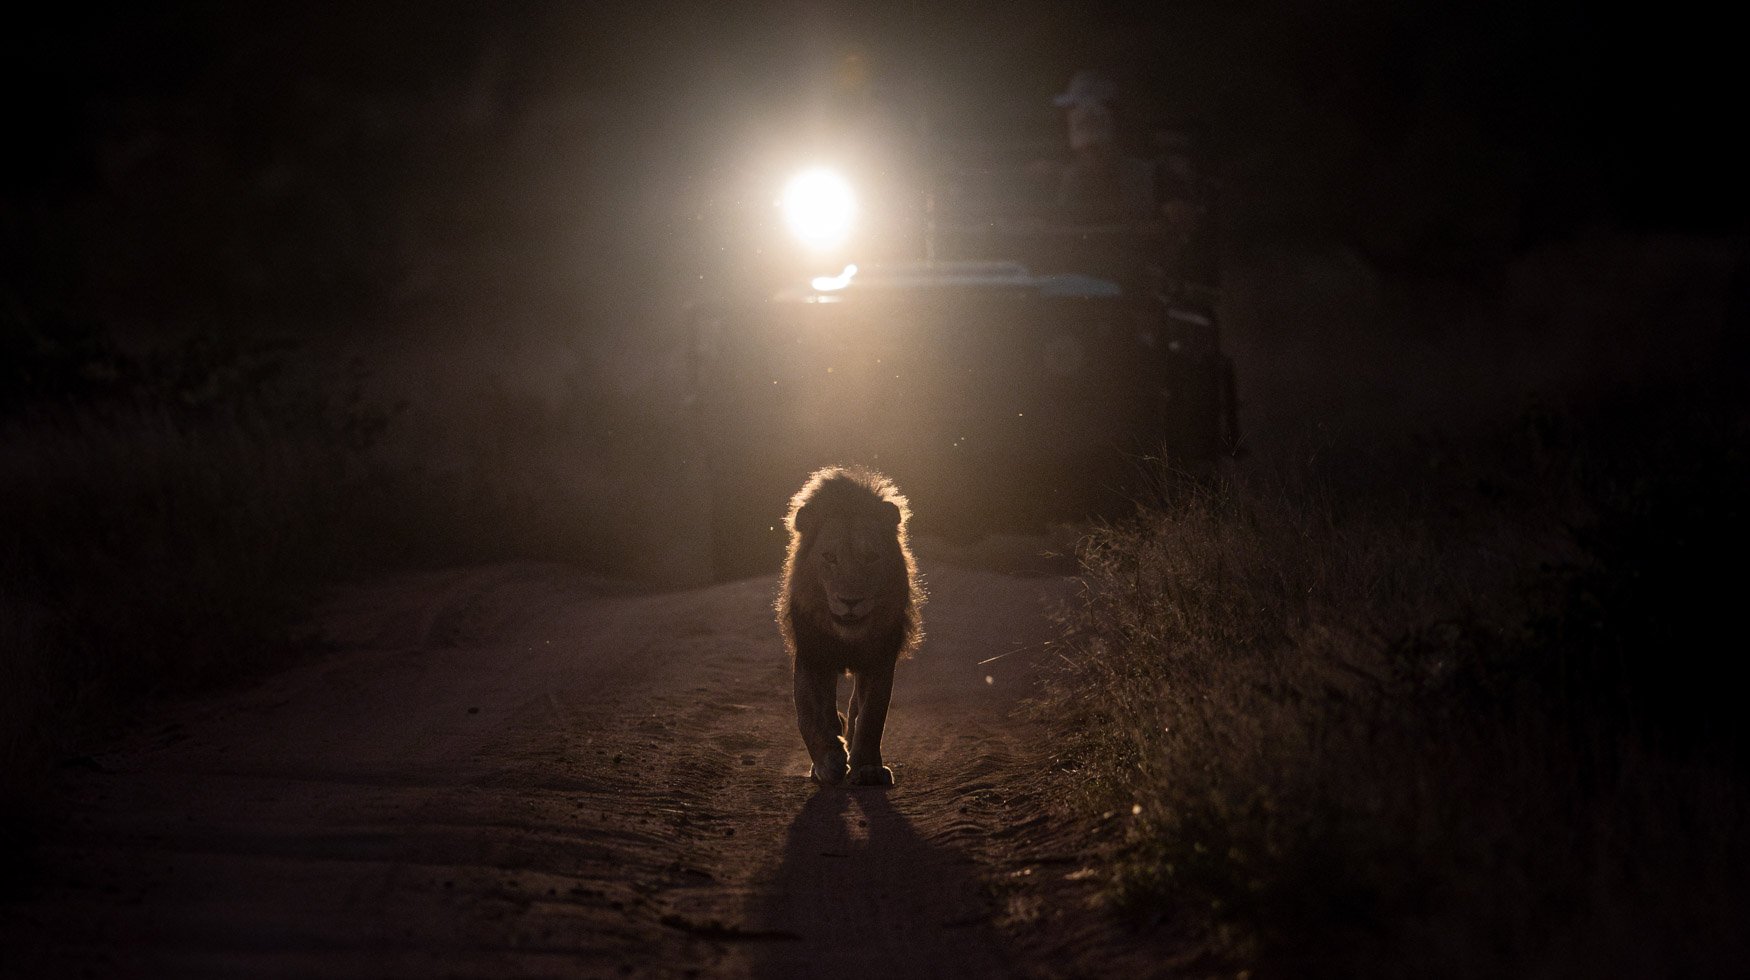
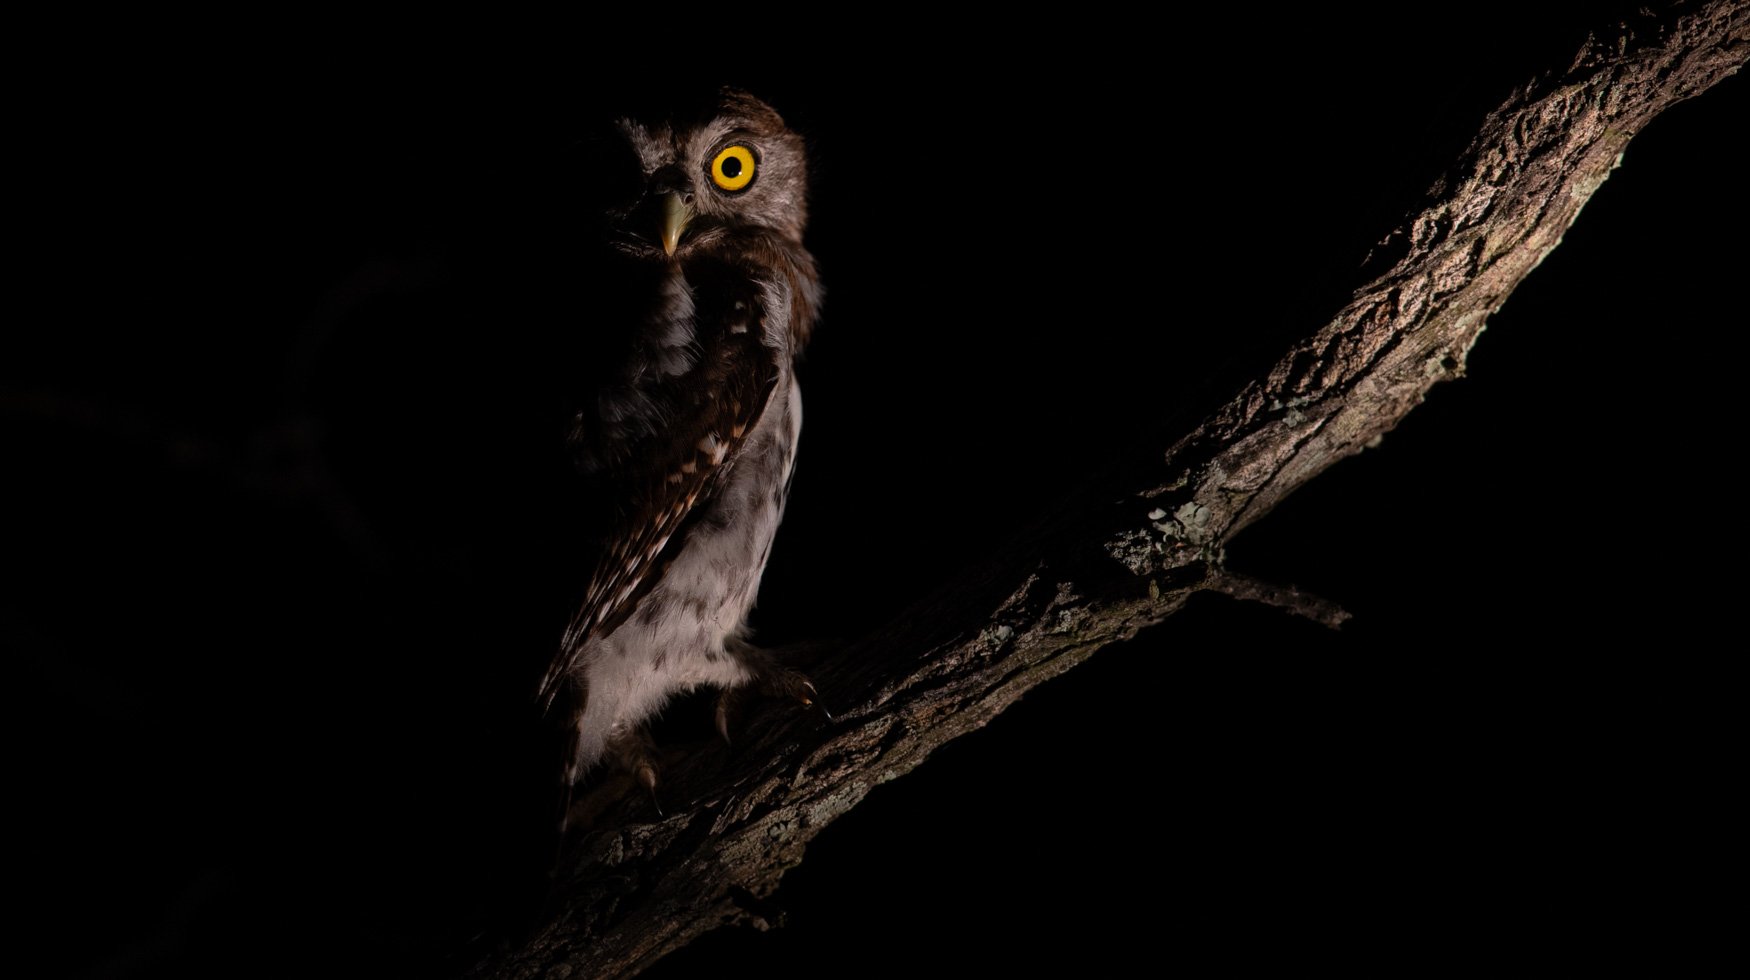
Select the Right Spotlight:
The spotlight is the hero of the show here. Without it, photographing wildlife at night is simply not possible. The quality of the spotlight also plays a major role in how you will need to set your gear up and at what distance away you can photograph the subject you're focusing on.
That said, if you're out on safari, this element is usually out of your control but you might be able to influence your guide to find out if there is a better, brighter, spotlight available.
The lodge spotlights are pretty standard but the following will help you when trying to find the best spotlight amongst the pile and/or if you're buying one of your own to use back home.
- Brightness and beam distance:
Look for a spotlight with high lumens (brightness) and a long beam distance. This ensures that the light reaches your subjects effectively, making it easier for you to capture clear and detailed shots from a distance. LED spotlights are often preferred for their brightness and energy efficiency.
- Adjustable Intensity:
A spotlight with adjustable intensity settings provides flexibility in controlling the amount of light emitted. This is important for adapting to different shooting scenarios and avoiding overexposure, especially when photographing nearby subjects.
- Colour Temperature:
Consider the colour temperature of the spotlight. Neutral or warm colour temperatures are generally preferred for wildlife photography, as they mimic natural lighting conditions and prevent colour casts in your images. If this is unavoidable, no need to stress, well only if you're shooting in RAW format, as you will be able to change your white balance in post processing.
- If rechargeable, battery life:
Check the battery life of the spotlight, especially if you plan on extended nighttime photography sessions. Having a spotlight with a long-lasting battery ensures that you won't be left in the dark when capturing those critical moments.
- Durability and weather resistance:
Wildlife photography often involves outdoor adventures, so choose a spotlight that is durable and weather-resistant. This ensures reliable performance in various environmental conditions and protects the spotlight from the elements.
- Size and Weight:
Consider the size and weight of the spotlight, as you'll likely be carrying it during your nocturnal photography expeditions unless you're out on a safari at a respective lodge .
To conclude this point, opt for a spotlight that strikes a balance between portability and functionality.
Ethical Considerations:
- Minimize disturbance:
Approach wildlife with caution, keeping a safe and respectful distance. Use the spotlight judiciously to avoid startling or disturbing the animals. Avoid shining the light directly into the animals eyes and minimise the time the spotlight is directed at any one subject, allowing them to carry on with their natural behaviour.
- Be mindful of nocturnal species:
Understand the behaviour of nocturnal species and choose appropriate subjects. Some animals are more sensitive to light, so it's essential to be aware of the potential impact of your spotlight on their activities. To simplify this, do not shine the light on any animal that is primarily active during the day and do not use the light on predators, and/or their pray, while hunting as this will give either species an unfair advantage.
- Use a red filter:
Consider using a red filter on your spotlight when you are not photographing or if you know you'll be converting the image into black and white. Red light is less likely to disturb wildlife as many animals, including mammals and birds, are less sensitive to red wavelengths. This allows you to observe and/or photograph them with minimal disruption.
- Avoid overuse of light:
Use the spotlight sparingly. Overusing artificial light can disrupt the natural behaviour of wildlife, affect their circadian rhythms, and even attract unwanted attention from predators.
- Know local regulations:
Familiarise yourself with local regulations and guidelines for wildlife photography. Some areas may have specific rules to protect wildlife, and it's crucial to respect these regulations to minimize the impact of your presence.
- Maintain a Safe Distance:
Keep a safe and respectful distance from wildlife. This not only ensures your safety but also prevents unnecessary stress for the animals. Use long lenses to capture close-up shots without encroaching on their personal space.
- Educate yourself:
Learn about the wildlife you are photographing. Understanding their behaviour, breeding seasons, and migration patterns can help you plan your photography sessions to minimise disturbance.
- Leave no trace:
Practice Leave No Trace principles. Ensure you leave the environment as you found it, without disturbing the natural balance of the ecosystem.
By following these ethical guidelines, you can enjoy the thrill of photographing wildlife at night using a spotlight while minimising your impact on their natural behaviours and habitats. Remember, always prioritise the well-being of the animals and contribute to the conservation of their environments.
Research and location scouting:
If you're wanting to practise this skill, it will be a good idea to familiarise yourself with the behaviour of the wildlife you intend to photograph. Research their habits, preferred locations, and active times. Scout locations during daylight to identify potential spots for nighttime photography.
If spotlight photography is something you would like to incorporate into your experience, be sure to ask who ever it is helping you plan this tour if night drives something they offer.
There are many destinations that offer this as part of the standard packages and others that may come with an additional charge. This is included in most, if not all private game reserves, more commonly found in Southern Africa.
Some of my personal favourites are:
- Sabi Sand Private Game Reserve - South Africa
- Timbavati Private Game Reserve - South Africa
- South Luangwa National Park - Zambia
- Okavango Delta - Botswana
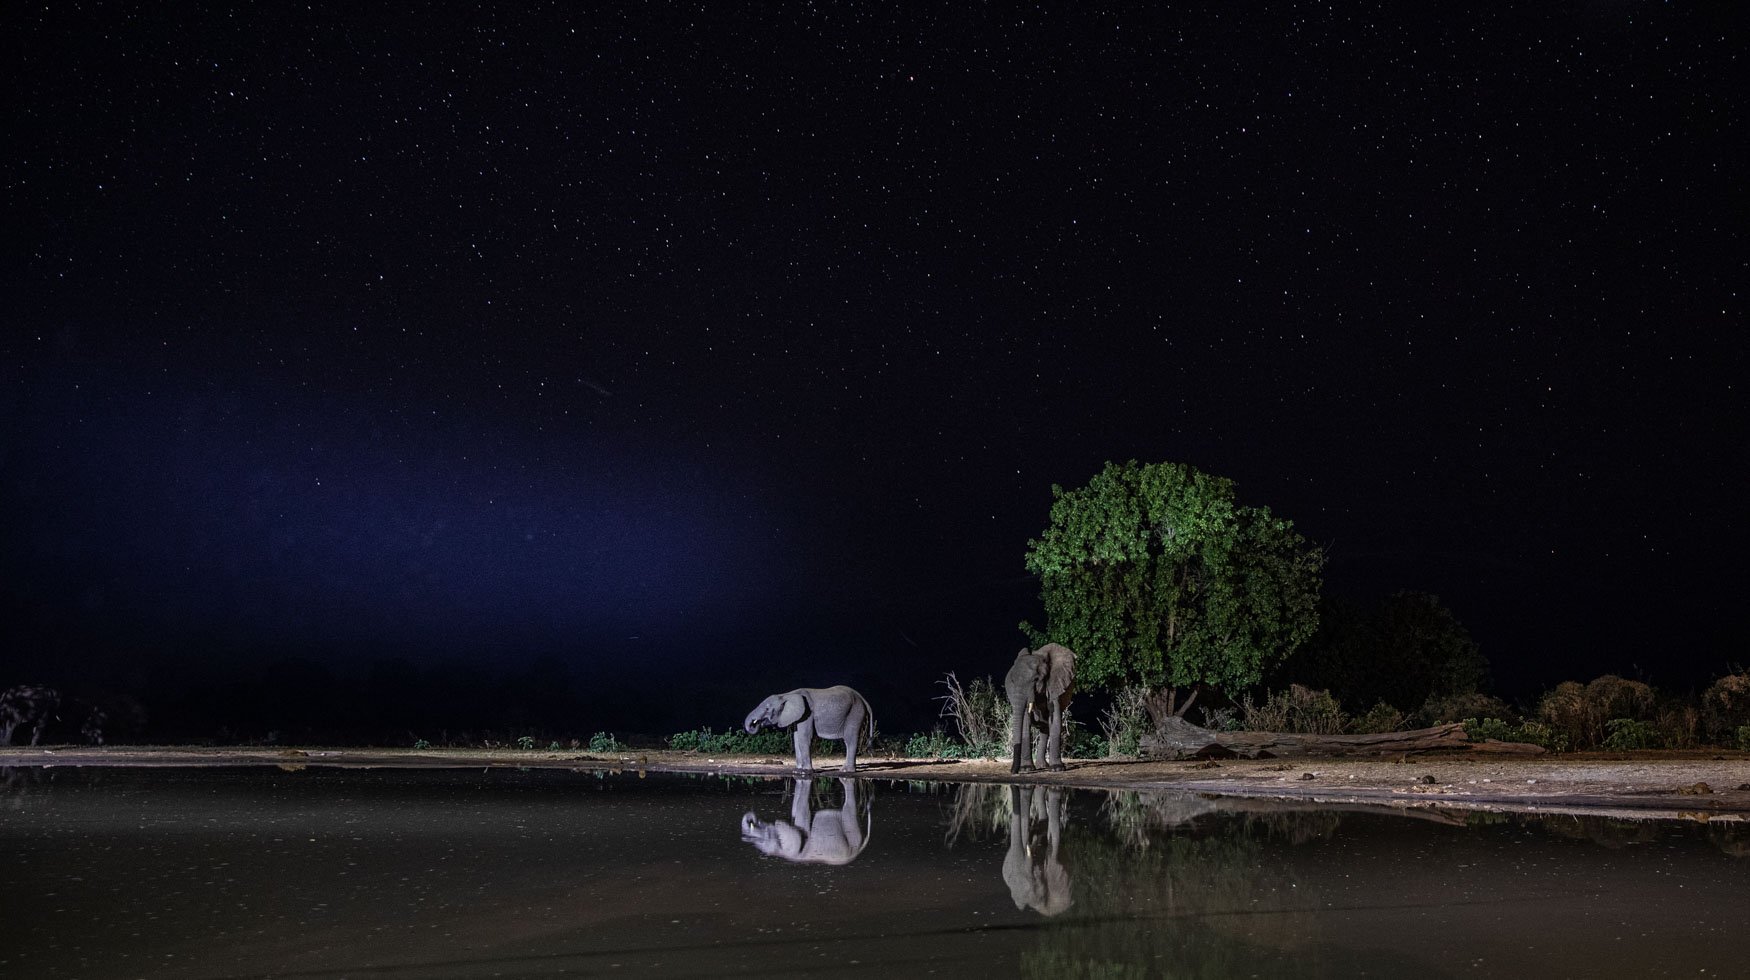
I've had a lot of fun out on safari in these areas after dark getting very creative with compositions, which we getting to, but got to experience an over night photographic hide last year and what a blast that was, and also a whole lot easier to photograph from.
I say this because photographing at night from a safari vehicle at night can be very unpredictable. As you photographing, the vehicle and/or people in it could move. Not ideal. Now in a well build over night hide, there is no risk of this. Your gear is secured on a gimbal or on a beanbag.
The down side to this is that you need to be very patient as you need to wait for the animals to come to you. Proper planning will increase your chances of this because hides are usually at a water source and so if you plan a hide visit durning the rainy months, the chances of animals approaching a man made water source is not too great.
The one of a kind experience my guests and I got to enjoy last year was combining Kenya's Great Migration and Lentorre where low level photographic hides and scenic aerial photography over Lake Natron and Lake Magadi to photograph vast flocks of flamingo and other wildlife.
Here our nights were dedicated to the photographic hide. I have experienced a few hides during my time as a guide but Lentorre have made some fantastic adjustments to the underground hide and the waterhole. The lighting is next level! Front, side and/or backlighting. This new setup allowed me to control the amount of front lighting and switch the backlighting on or off with the flip of a switch. The results speak for themselves.
When do you sleep you may ask? Well when you're tired...
Lentorre have us covered. They provide use with watch men who spend the nights in the hides with you who will wake you when anything approaches the water.
Please know not all destinations/hides provide these services and are no where nearly as kitted out as this one.
Adjust Camera Settings:
- Set your camera to manual mode to have full control over settings. Adjust the following parameters:
- Aperture (f-stop): Choose a wide aperture (low f-number) to let in more light and do not touch that again.
- ISO: Increase ISO to compensate for low light conditions, modern cameras handle higher ISO settings better than older models but please remember that noise can be easily fixed. It all comes down to light intensity but I usually start at around 3200 and adjust if necessary.
- Shutter Speed: we always say a fast shutter speed is necessary to freeze the motion of wildlife. However, in low light at night, we need to consider the balance with ISO and aperture. I generally try keep my shutter speed 1/my focal length as this will balance out my camera shake. If I can go faster, I will. If I need to go slower, well the I do, or I just up my ISO.
Focus Carefully:
It is not easy to acquire focus when you have little to low light to work with, but as mentioned earlier, when buying a camera, consider a camera with reliable autofocus performance in low light. Some cameras offer advanced autofocus systems specifically designed for low-light conditions, helping you achieve accurate and quick focus even when using a spotlight. Also ensure that the lens has reliable autofocus capabilities, especially in low-light conditions which will allow you to capture elusive wildlife moments with precision a lot easier.
The best way to set up your autofocus on your camera:
- Use single autofocus (AF-S) mode rather than continuous (AF-C) if your subjects are relatively stationary. Single autofocus is often more accurate in low light.
- Use a single focus pointing for the most part, select the centre autofocus point on your camera. The center point is often more sensitive and accurate in low-light conditions.
- Pre-focus on high-contrast areas if autofocus is struggling, aim to pre-focus on high-contrast areas (where the brightest and darkest parts of the scene meet), such as the edge of a subject or a well-lit object, before recomposing the shot.
- If all else fails, use manual focus. In extremely low-light situations, consider switching to manual focus. Use live view mode on your camera's LCD screen to zoom in on a subject and manually adjust focus for precision.
Compose Thoughtfully:
For the most part, these images will be of high contrast. Very bright areas that jump off a very dark background and so it is very important to pay attention to your composition. That said, also be mindful of reflections from the environment and/or from the spotlight itself.
Even though many distracting elements will be disguised in a blanket of darkness, you still have to consider the light direction and what this is doing to the background, foreground, and overall framing to create visually appealing images.
Once that's done, you also need to compose your shots with the spotlight in mind, using it to highlight specific features or create dramatic, moody effects by using the many shadows to your advantage. Ensure you frame the shot well creating a balanced composition. Utilize negative space and capture the atmosphere when ever possible.
Animal movements are unpredictable and if your subject is not where you want it to be you can move if possible, wait for the subject to move, or what usually works very well is to use a light source form an interiorly different direction to provide you with side and/or back lighting.
Experiment with Angles:
This is very much dependant on activity and even more so, destination.
- Low angle shots:
Capture the scene from a low angle to emphasise the scale and importance of your subjects against the night sky. This can be particularly effective when photographing people or structures illuminated by the spotlight.
- High angle shots:
Try shooting from a higher vantage point to provide a different perspective. This can be achieved by finding an elevated platform.
- Eye-level perspective:
Photographing from an eye-level perspective can create a more intimate connection with your subjects. This is especially effective when capturing portraits or scenes where the viewer should feel a sense of being present.
- Oblique angles:
Experiment with shooting from oblique angles, where the camera is tilted or positioned at an angle to the subject. This can add a dynamic and unconventional feel to your compositions.
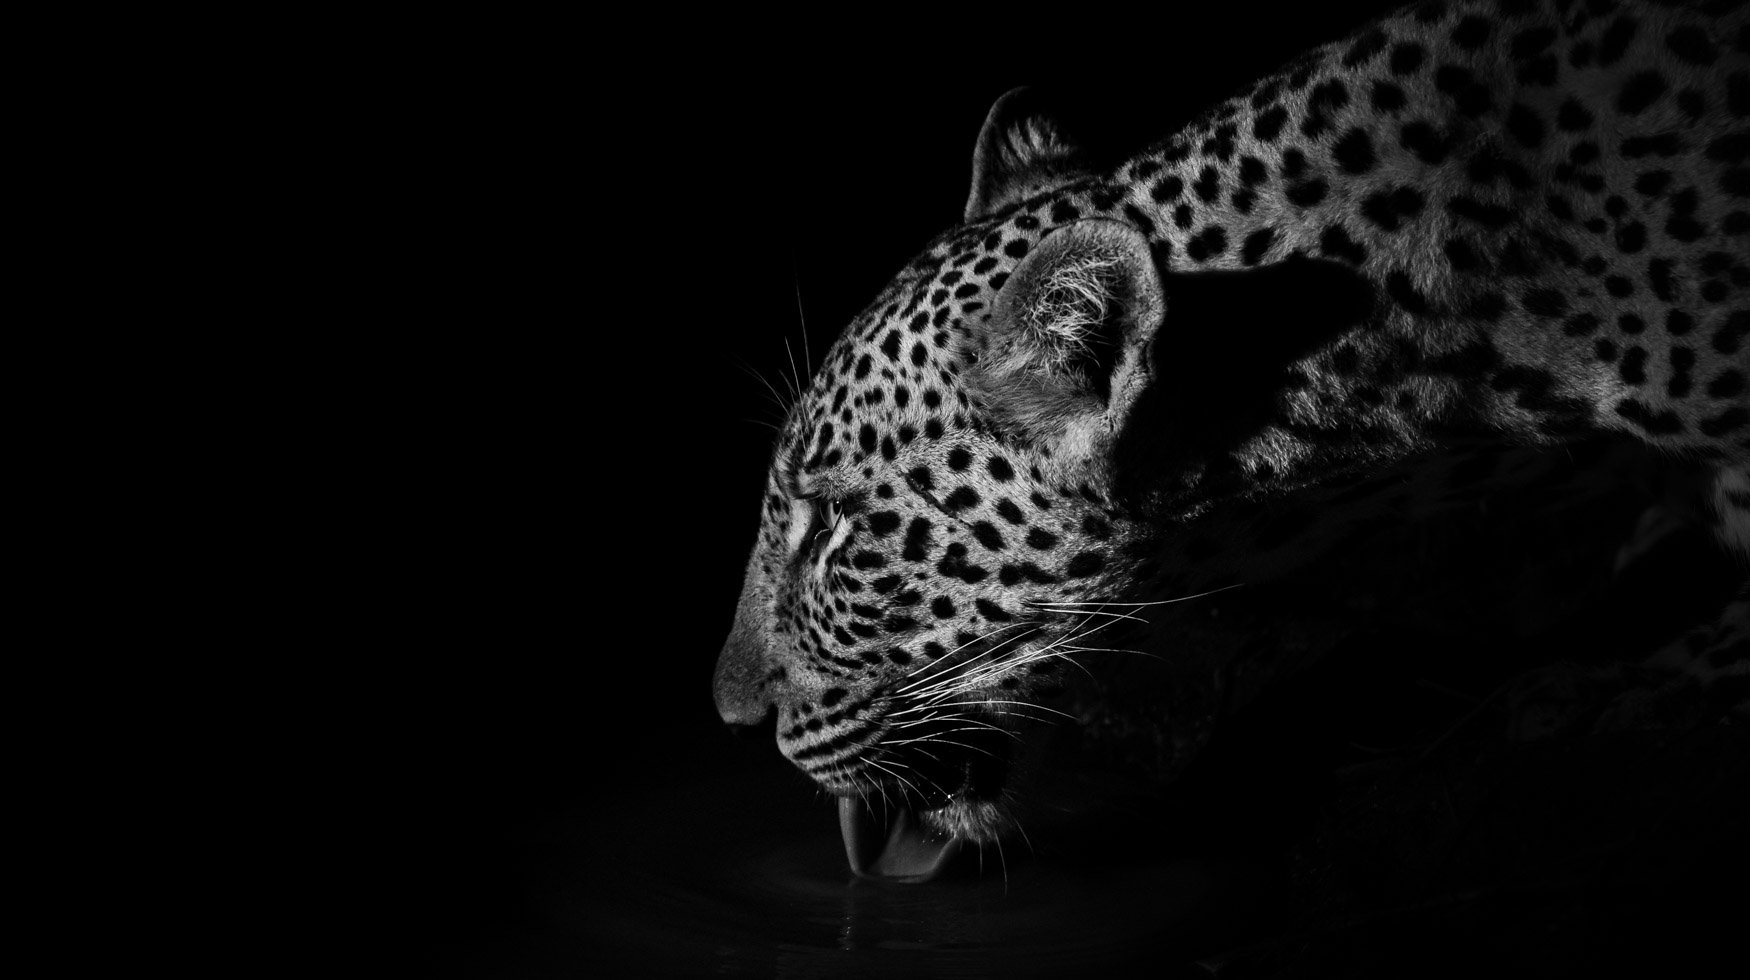
- Close-ups and detail shots:
Get up close to your subjects if safe to do so and focus on capturing details illuminated by the spotlight. This could include facial expressions, intricate textures, or interesting patterns.
- Wide-angle perspectives:
Use a wide-angle lens to capture expansive scenes and include more of the night sky. This is particularly effective when photographing landscapes or cityscapes illuminated by a spotlight.
- Back/side lighting:
Experiment with lighting by positioning the spotlight in various areas around your subjects. This can create silhouettes and add a dramatic effect to your images.
- Reflections:
If there are reflective surfaces nearby, such as water or glass, explore angles that capture the reflections of your subjects illuminated by the spotlight. Reflections can add depth and interest to your compositions.
- Diagonal Lines:
Incorporate diagonal lines into your compositions to add a sense of movement and energy. Experiment with the positioning of your subjects and the spotlight to create dynamic diagonals.
- Combine Angles:
Combine different angles within the same shoot if possible to create a diverse set of images. For example, you could start with a low angle, then switch to eye-level, and finally, experiment with a high angle.

Be Patient and Observant:
This is probably the most important point because wildlife photography requires patience. A lot of it!!
Observe the behaviour of the animals and be ready to capture spontaneous moments. Remember, keep the spotlight movements gradual and avoid sudden changes that may startle the wildlife.
Post-Processing:
These images are pretty simple to edit as the extreme dark background and hints of highlights from the spotlight will be doing most of the work for you.
In post-processing, the main things you'll need to adjust is the white balance (for if the light is too cool and/or tool warm), contrast (so whites, blacks, highlights and shadows), and sharpness to enhance your images.
If you used a high ISO, be mindful of using noise reduction to maintain image quality.
RAW Image
Edited Image

As we bring our exploration of wildlife photography using a spotlight at night to a close, I hope this journey has ignited a newfound passion for capturing the beauty that unfolds in the night. Armed with the knowledge of essential techniques, the right gear (please also know the best gear to have is the gear you have with you), and a deep appreciation for the wonders of the nocturnal world, you are now equipped to embark on your own nocturnal adventures.
Remember, to prioritise the welfare of the wildlife and follow ethical guidelines for wildlife photography. Minimize disturbances, use appropriate lighting, and respect the natural behavior of the animals you are photographing. Patience and respect for the creatures you encounter are key to creating stunning wildlife photographs.
So, go venture into the darkness, let your spotlight guide you, and unveil the mysteries that the night holds. Happy shooting, and may your photographs tell the captivating stories of the creatures that thrive under the moonlit canopy.
Until next time,

My passion for the bush and everything that comes with it started as far back as I can remember. Thanks to my parents who introduced me to wilderness areas at a very young age, I managed to live my dream by obtaining a background in conservation and being a lodge-based ranger for the past four years, working in world-renowned places such as the Timbavati and Sabi Sands Private Game Reserves.
PHOTOGRAPHY TIPS
There is plenty more where this came from in terms of photography tips on offer. You can check out our blog for a whole selection of tips and tricks for your wildlife photography from our expert photographic guides.
OW