Have you ever found yourself wishing that you could capture more of a scene you find yourself in? I do not have the lens for the job, or the animal is too close etc. Well, making use of the photo merge tool in Lightroom might just be your solution.

Your answer might have been no to that previous question but let me tell you, there is always room for growth. No matter what photography style you’re into, you’ll want to learn how to photo merge at some point.
You'll notice that the results can feel much closer to what the human eye sees.
Lightroom’s Photo Merge tool is ideal for you to begin experimenting, as it is so easy to use.
What Is Photo Merge?
To keep this brief, it's a process that combines several photographs into one continuous image. If you're into printing your own work, merged images are great for printing large artwork.
Lightroom offers a tool within it called Photo Merge. The Photo Merge tool is the only way to create these images in Lightroom from multiple photographs without relying on any other programs’ aid. There are some downsides but at least Lightroom’s panorama in-house stitching is pretty basic. The results are usually good, but it can become flummoxed pretty easily. You don’t have a lot of control and there’s no room for manual tweaking of control points, blending areas, masking, or vignette smoothing. If you need that, you’ll still need to resort to Photoshop or, better yet, something even more powerful like PTGUI Pro.
A quick tip - Taking multiple sequence images of the scene you wish to stitch together may help you eliminate having to delve into more powerful software.
How It Works.
You’ll first have to take a sequence of images out in the field. When taking these photographs, the following is very important to keep in mind.
- Try limit the up/down movement of your camera while you pan across while capturing multiple images.
- From the first image onwards, try and keep at least one third of what was in the right of the previous scene on the left of following scene you capture.
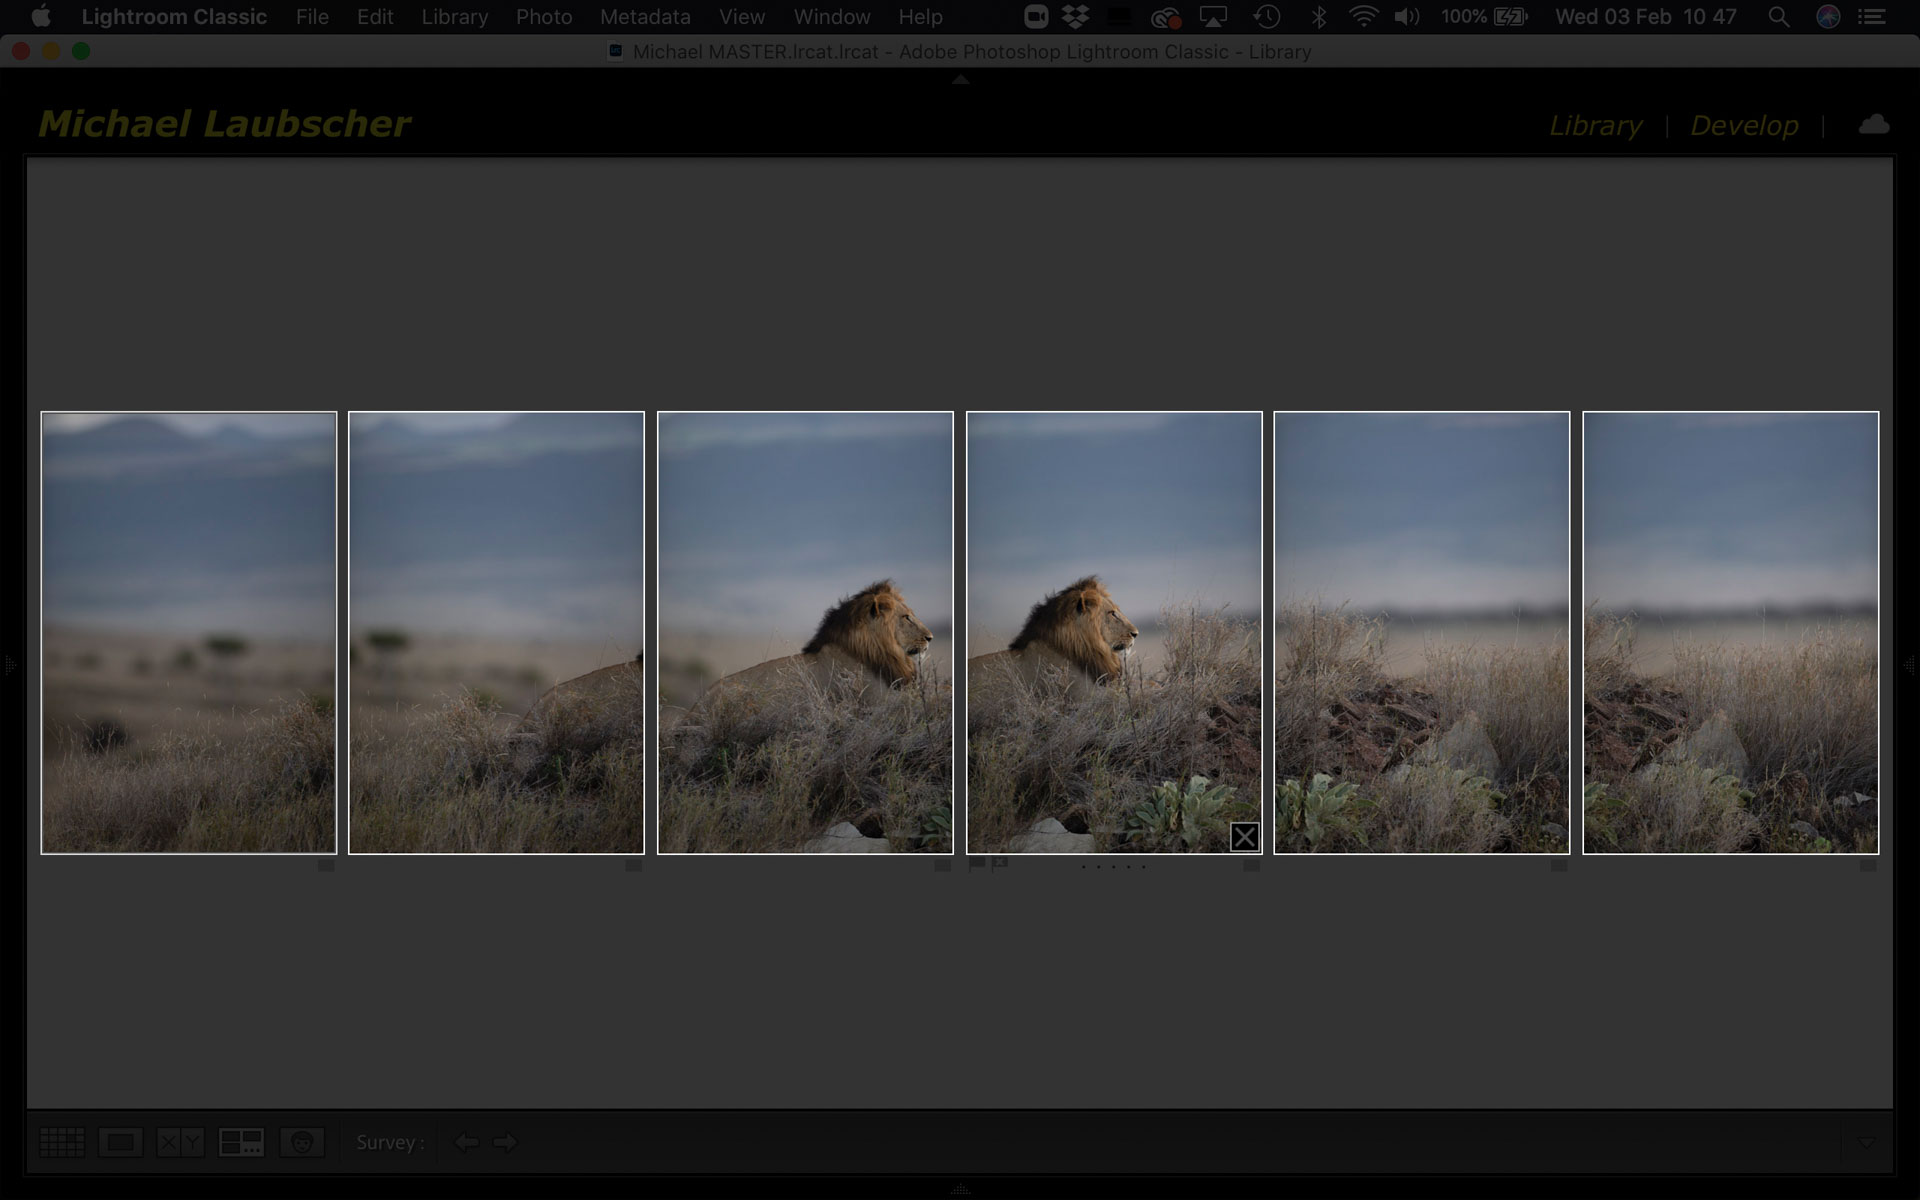
Once in Lightroom, either in the Library module or the Develop module, make sure all of the thumbnails for the images you’re using are selected.
You then have 3 options to access the stitching feature:
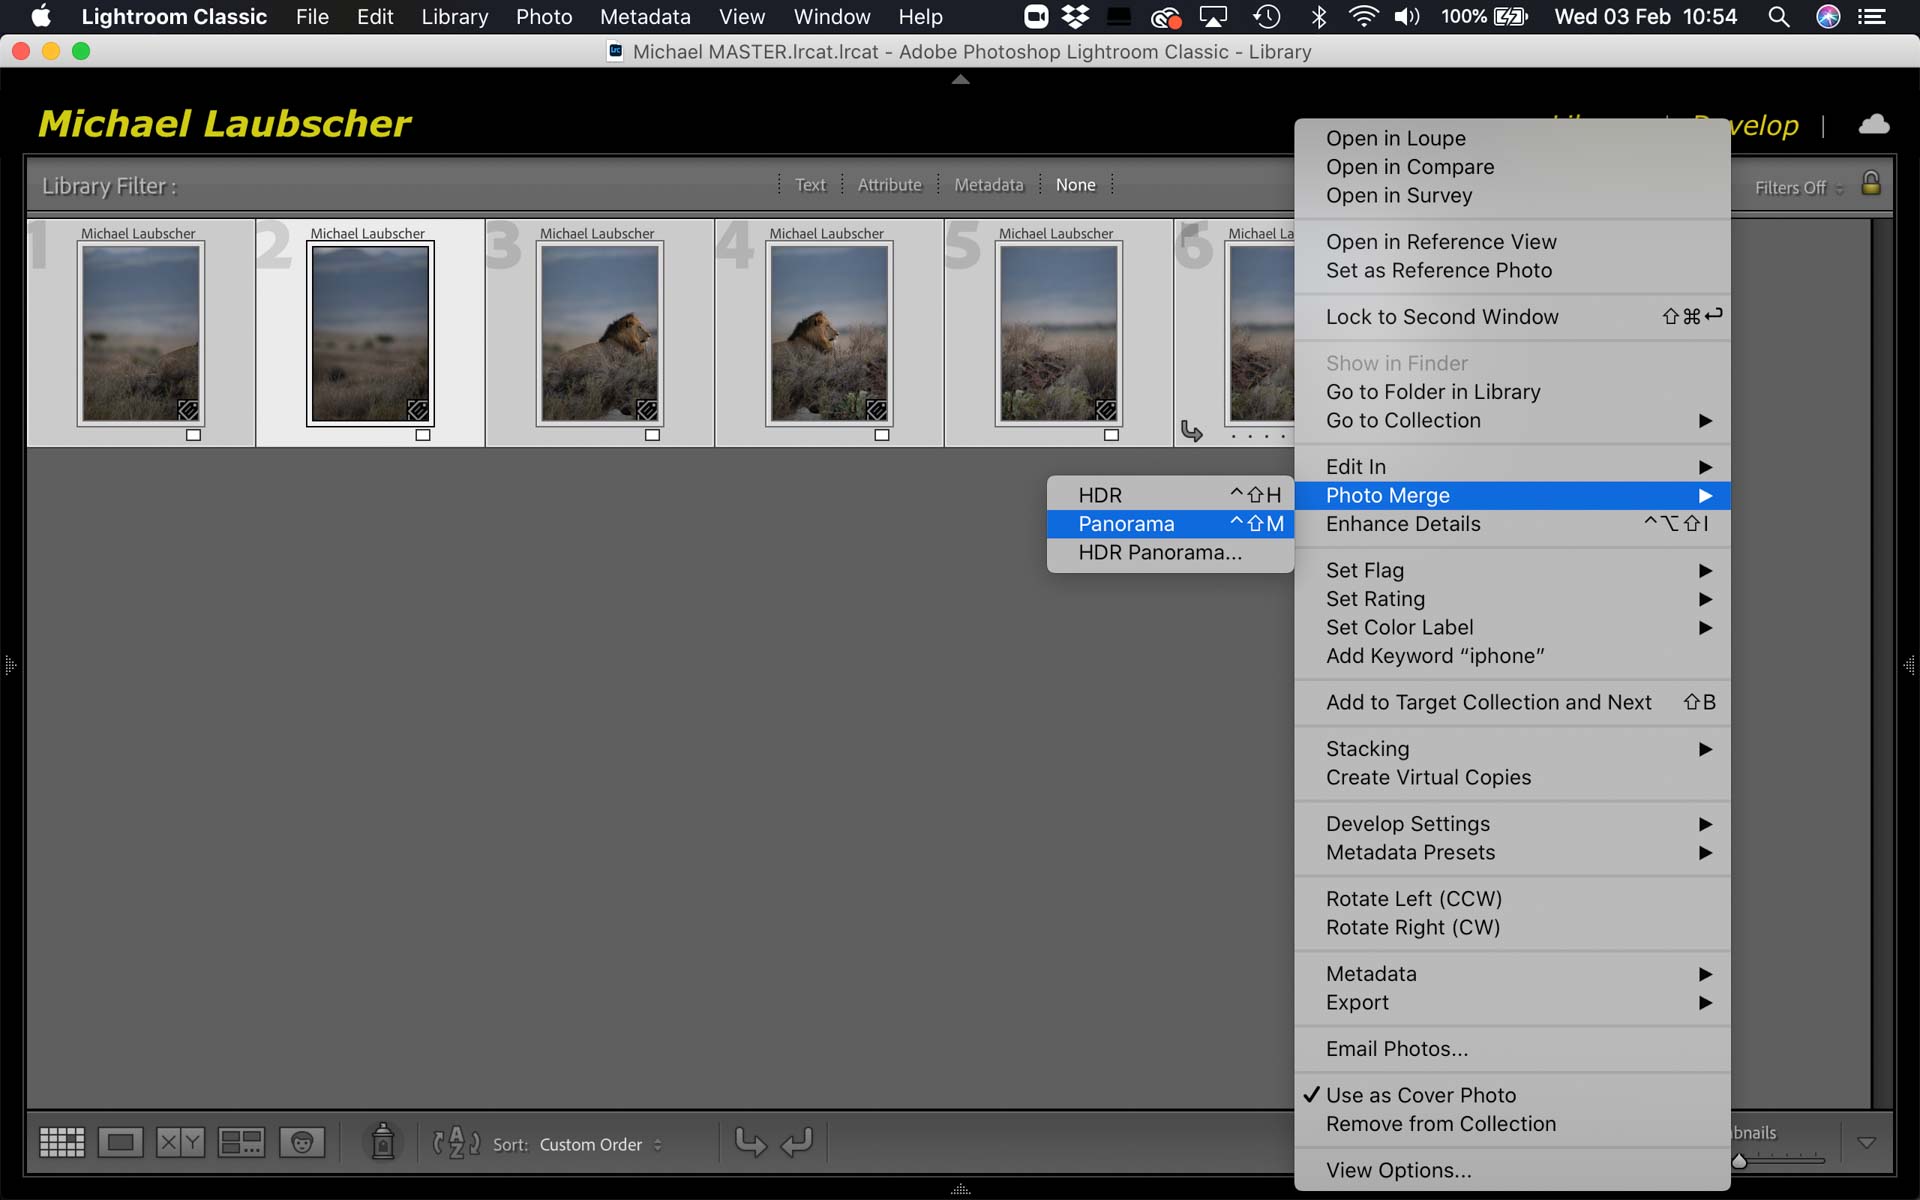
- Right click on the thumbnails and choose Photo Merge > Panorama
- Use the keyboard shortcut CTRL-M
- From the top menu, choose Photo > Photo Merge > Panorama
Once the preview is generated, you have some options to the right. You can manually select Spherical, Cylindrical, or Perspective to achieve your desired result.
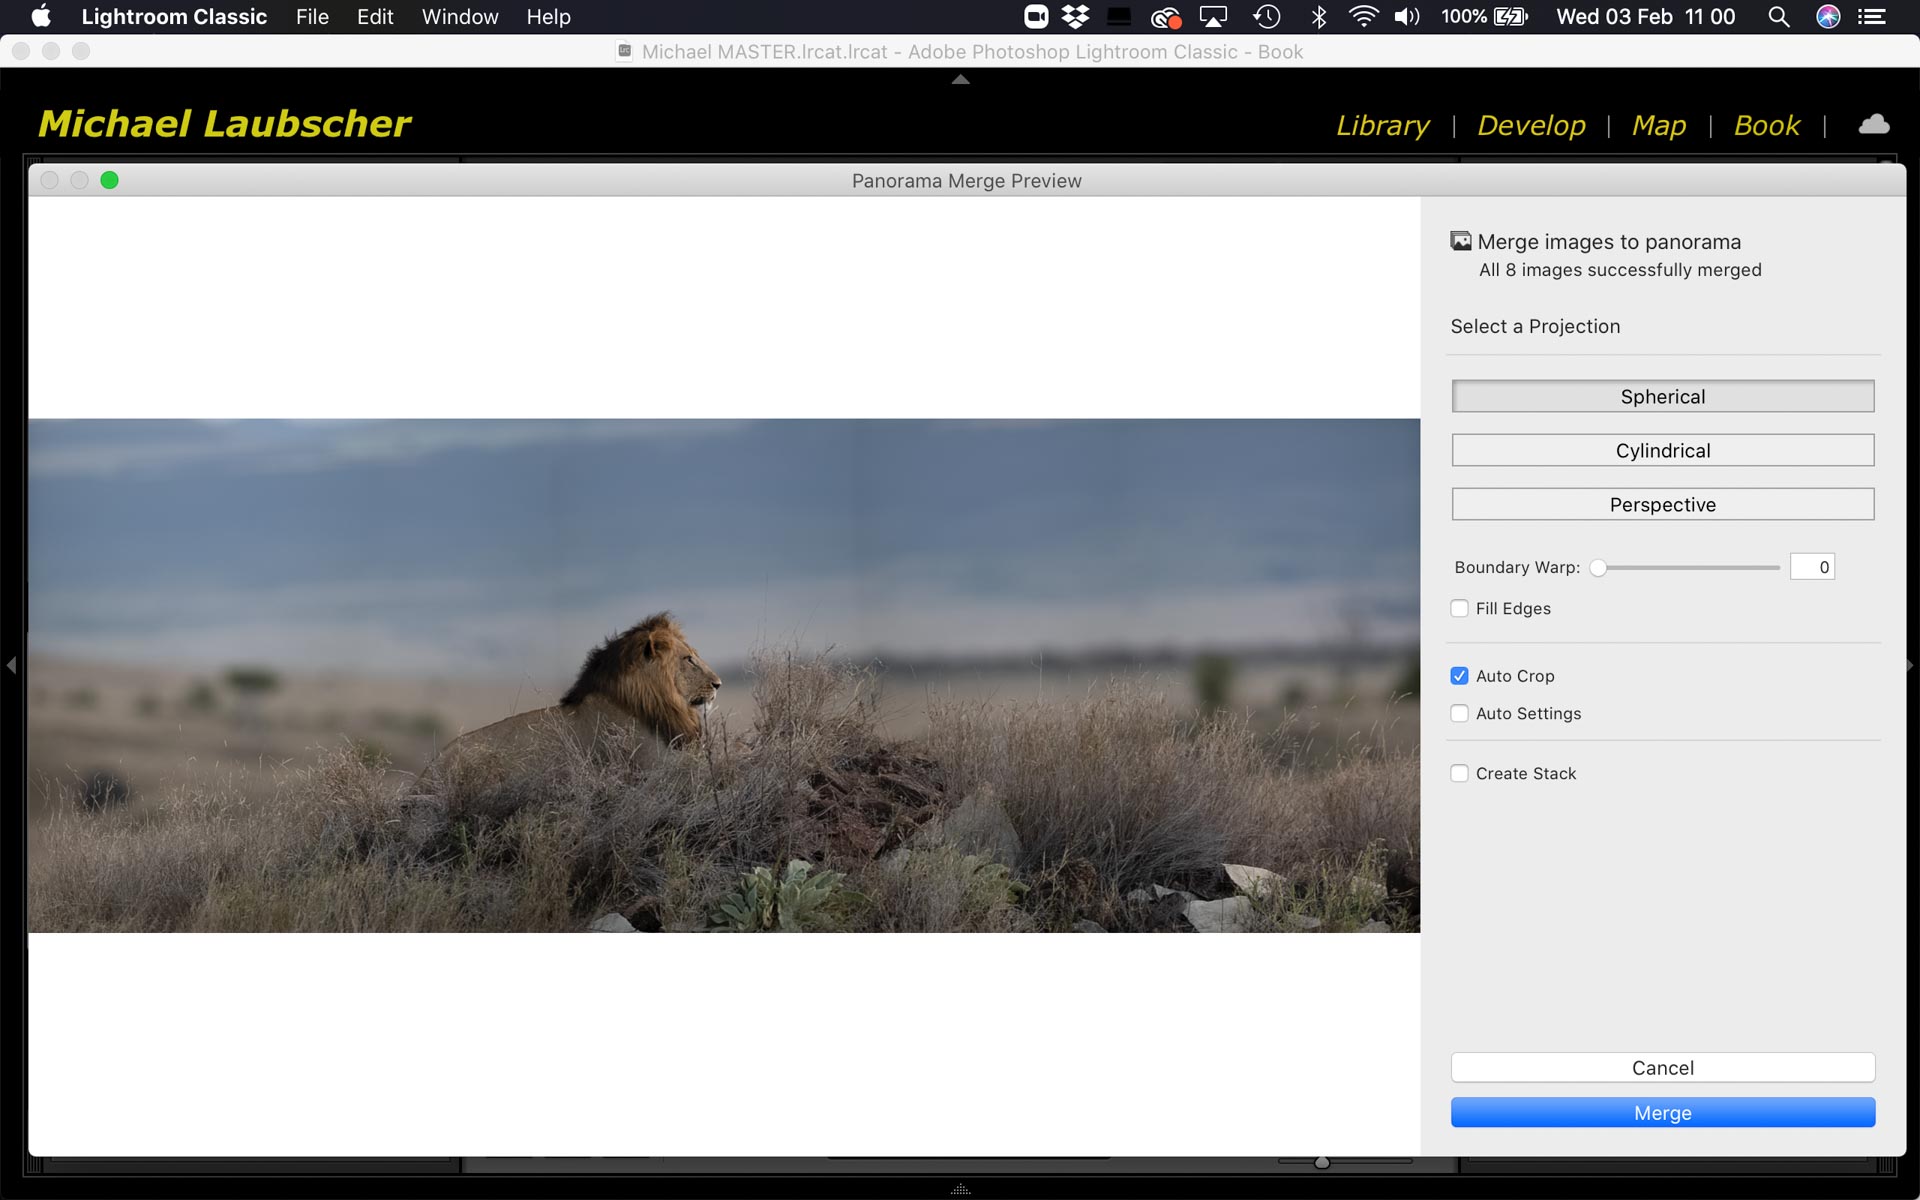
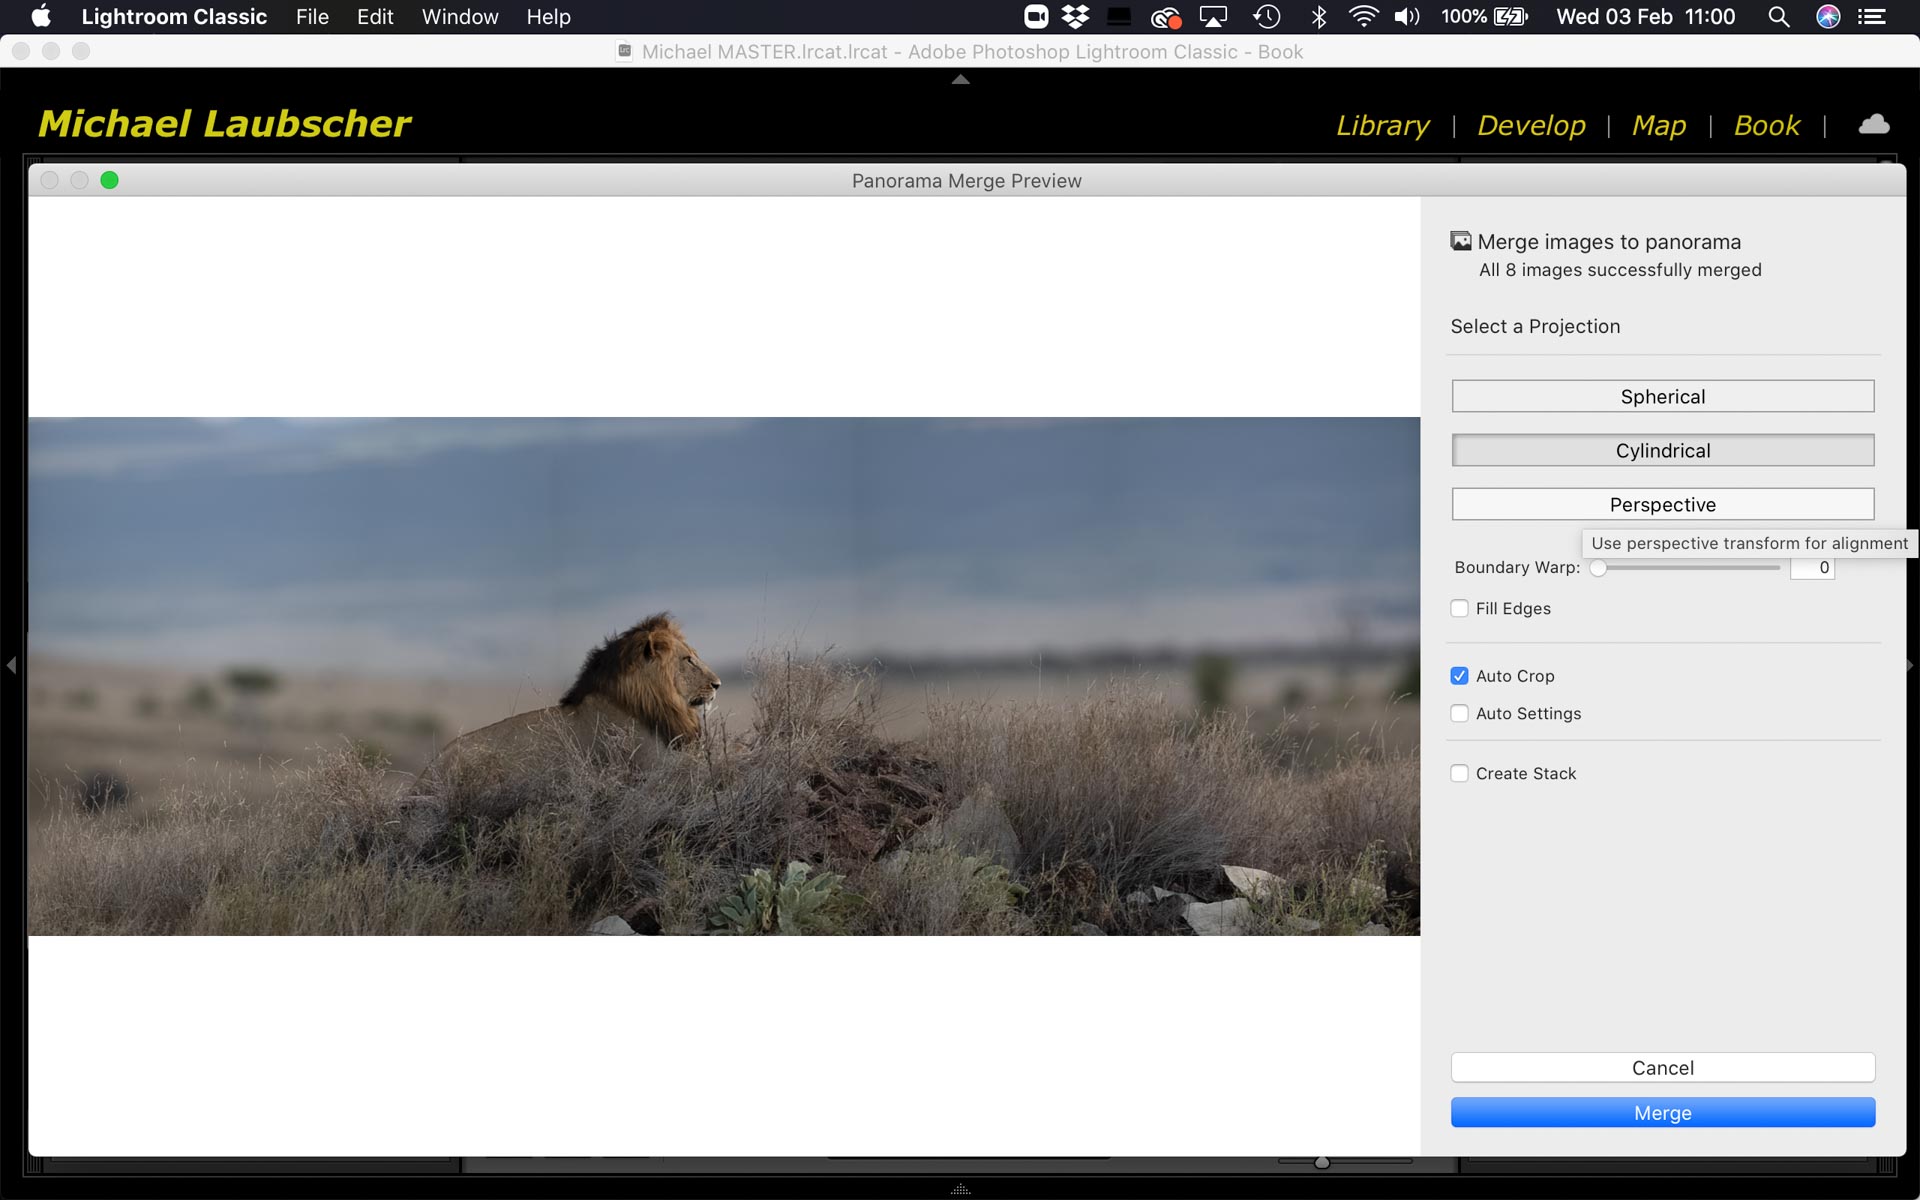
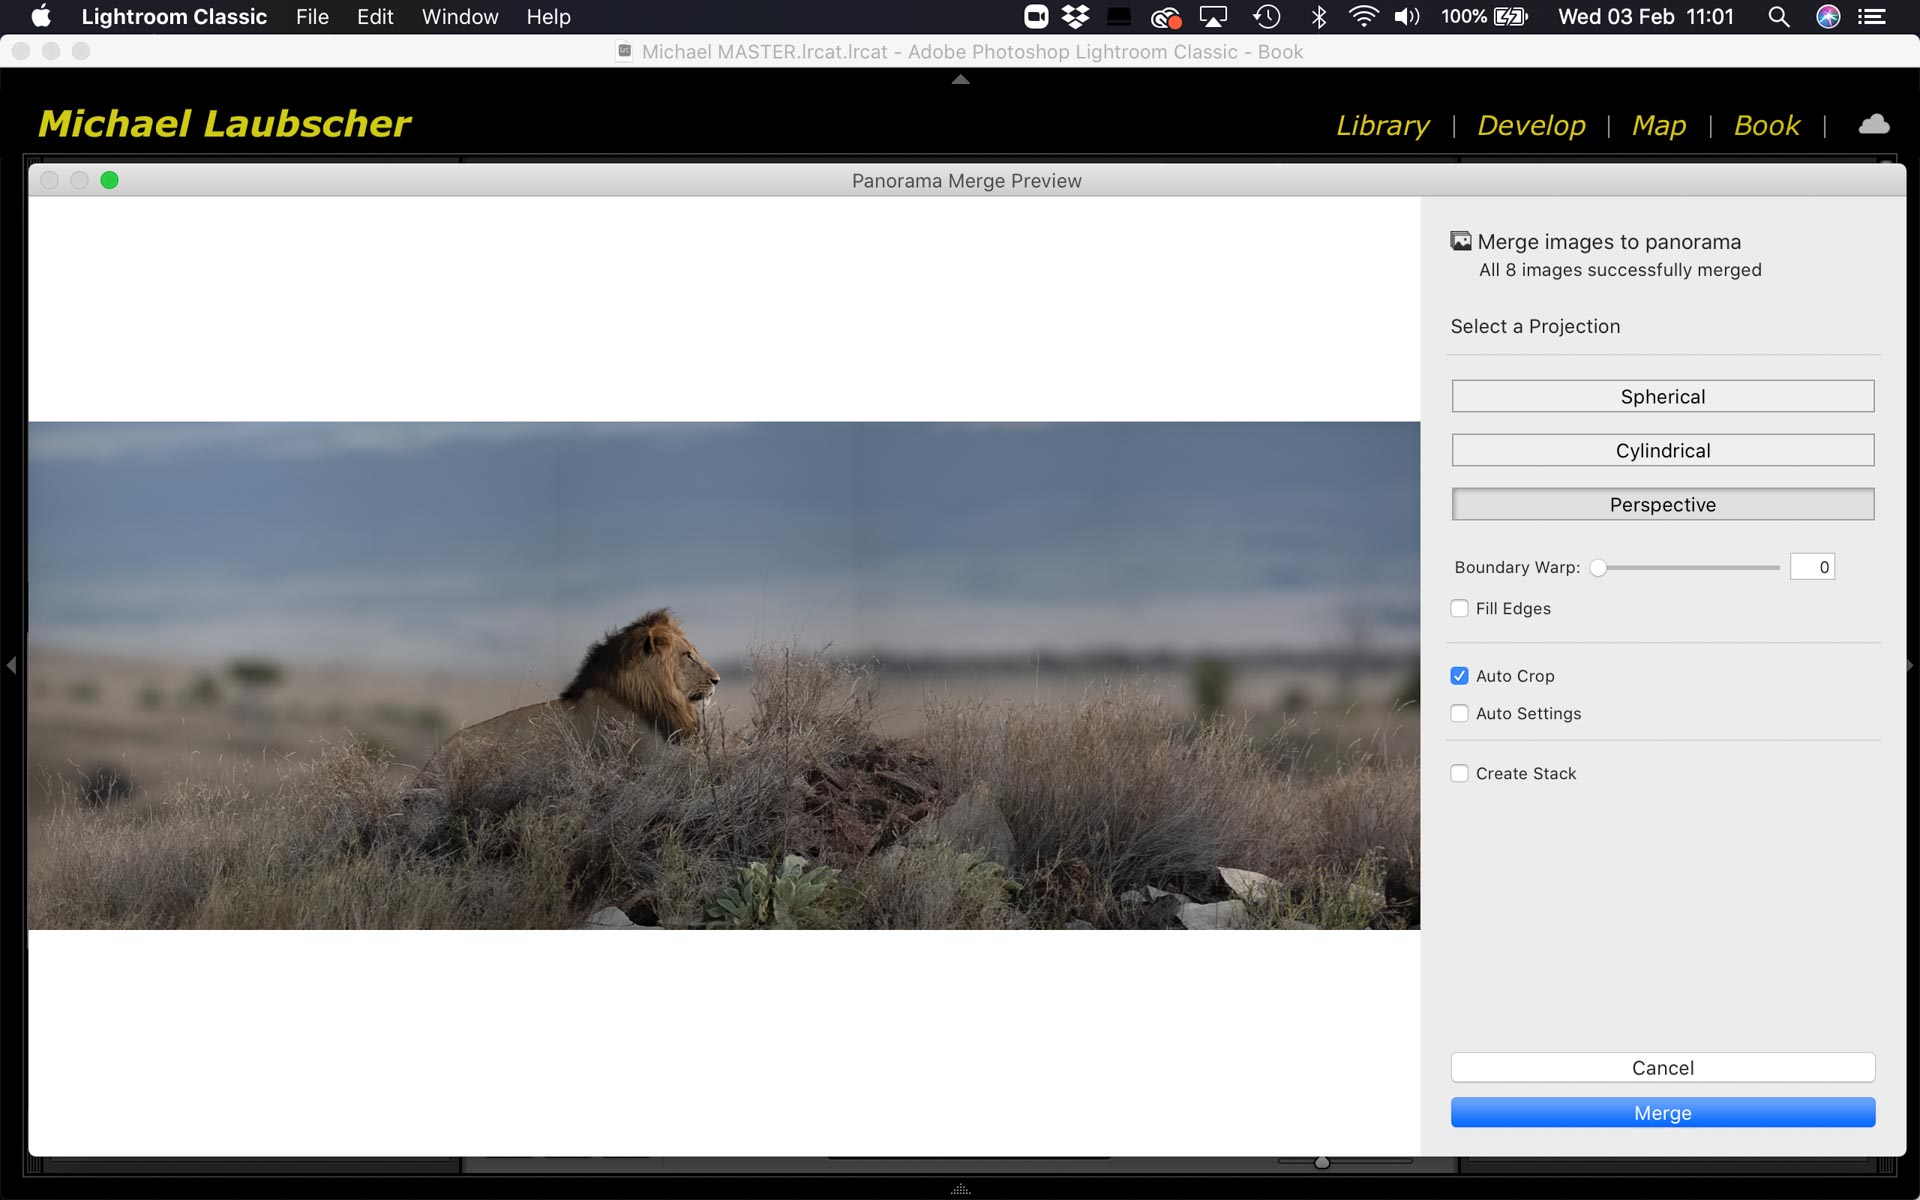
The next option is for automatic cropping. It usually does a great job in removing the dead space from around the individual images. You could also manually do this by dragging the 'Boundary Warp' slider to the right until the white border around the panorama preview disappears.
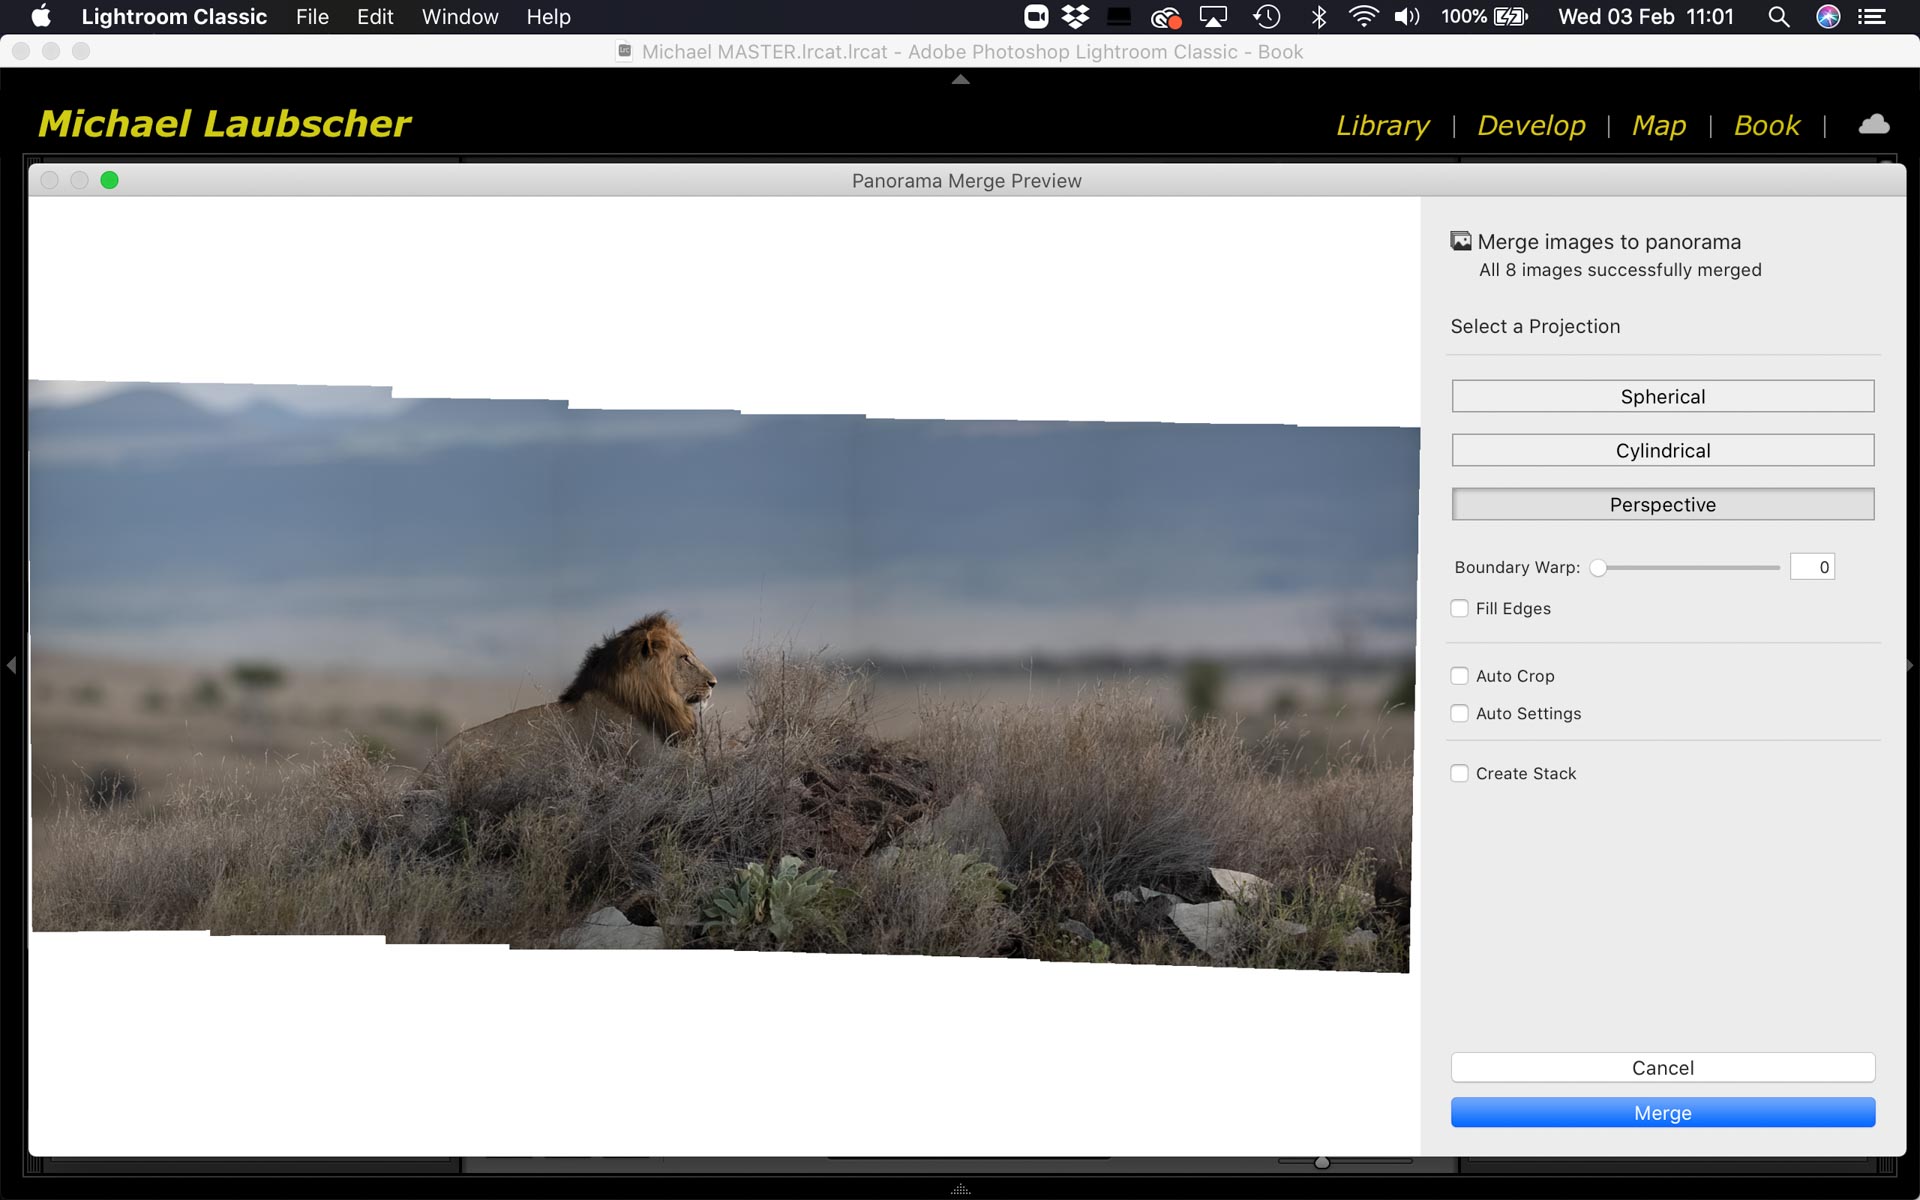

It’s really a convenience thing and you can of course always applying cropping later. An example of when you might not want to do auto cropping is if you have only a small section that doesn’t overlaps between images that you’re later going to fill with something like Photoshop’s patch tool.
I prefer making use of the new "Fill Edges" selection. This option will help you fill uneven edges with Adobe's Content-Aware Fill technology. This in turn results in you walking away with a larger canvas because auto crop tends to just meet at the image edges.
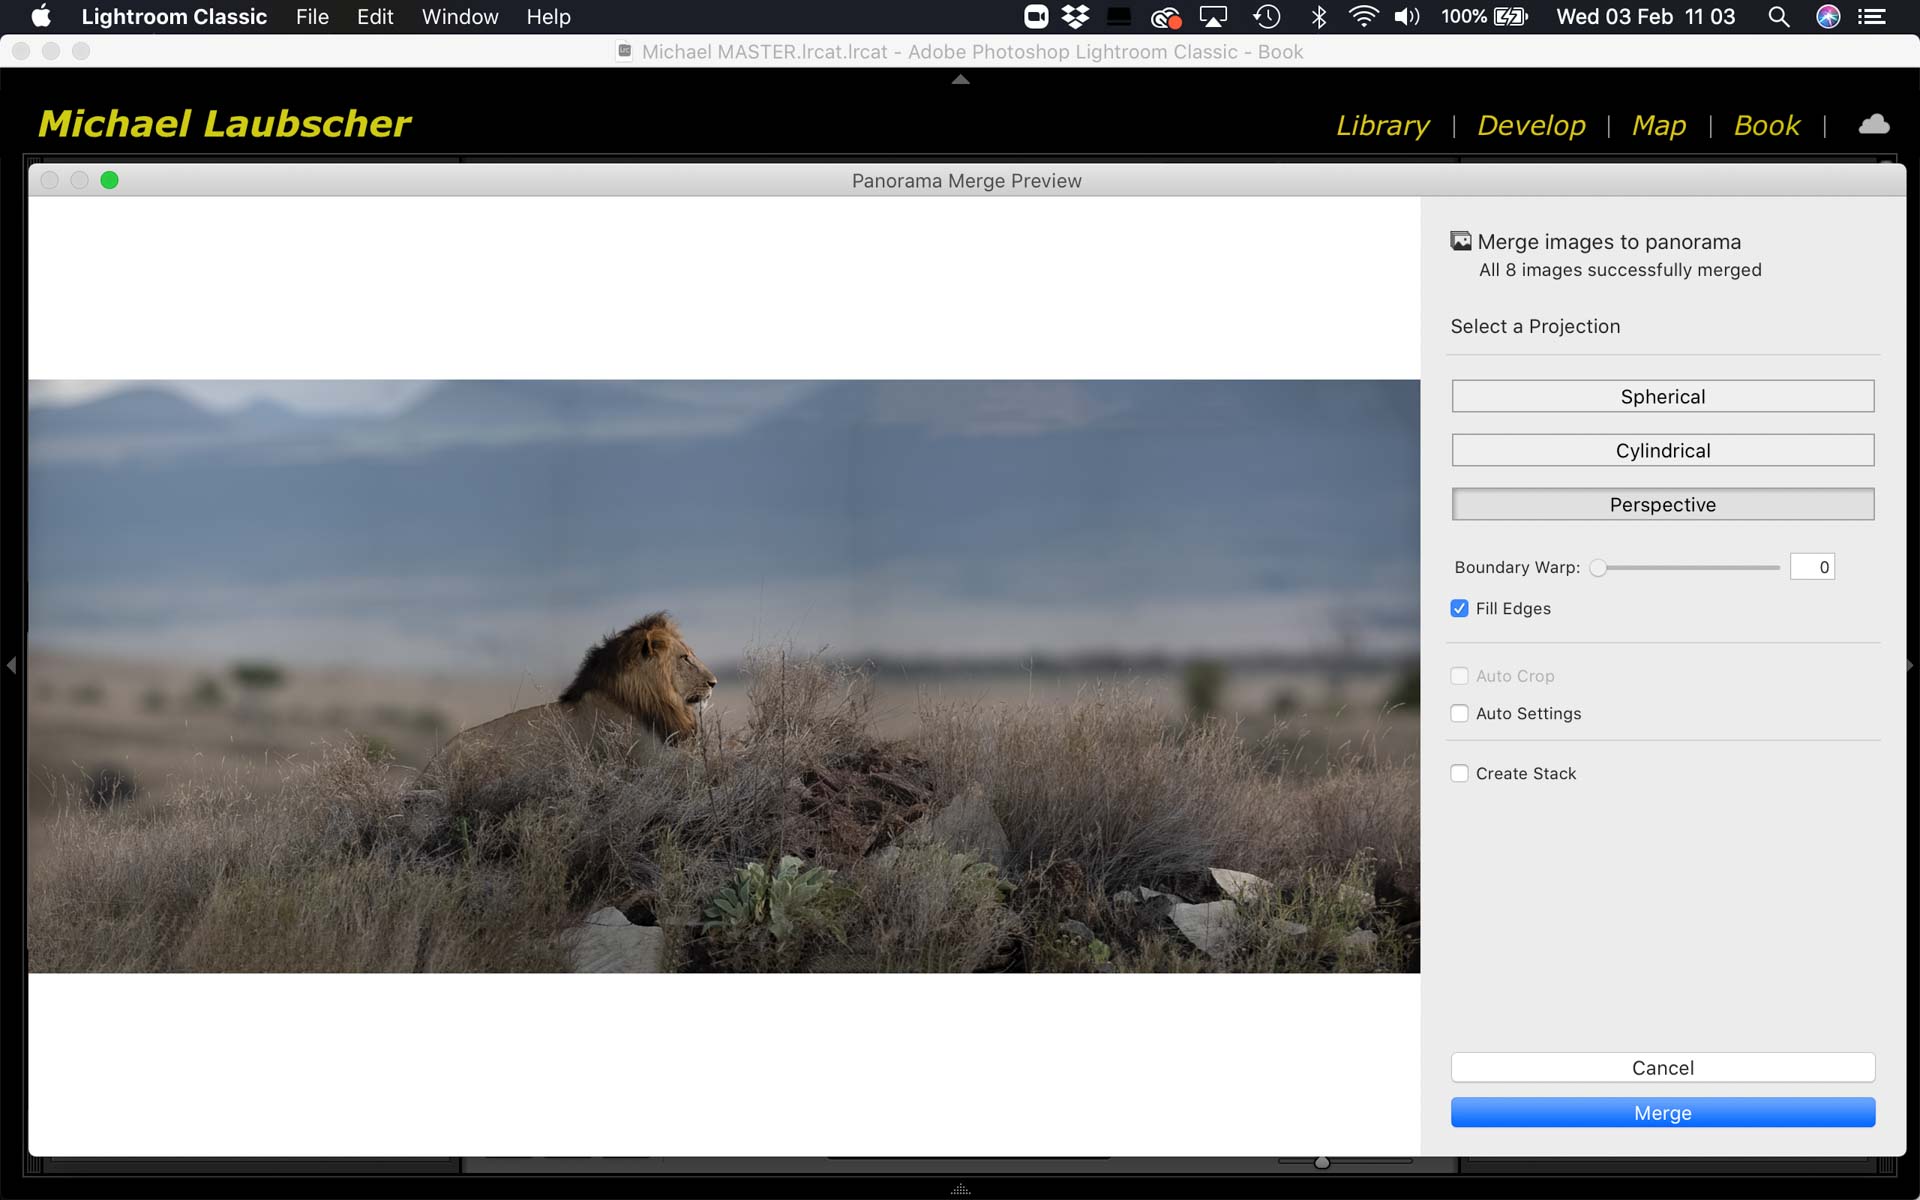

Once you’ve set those, you just select Merge and it will do its thing.
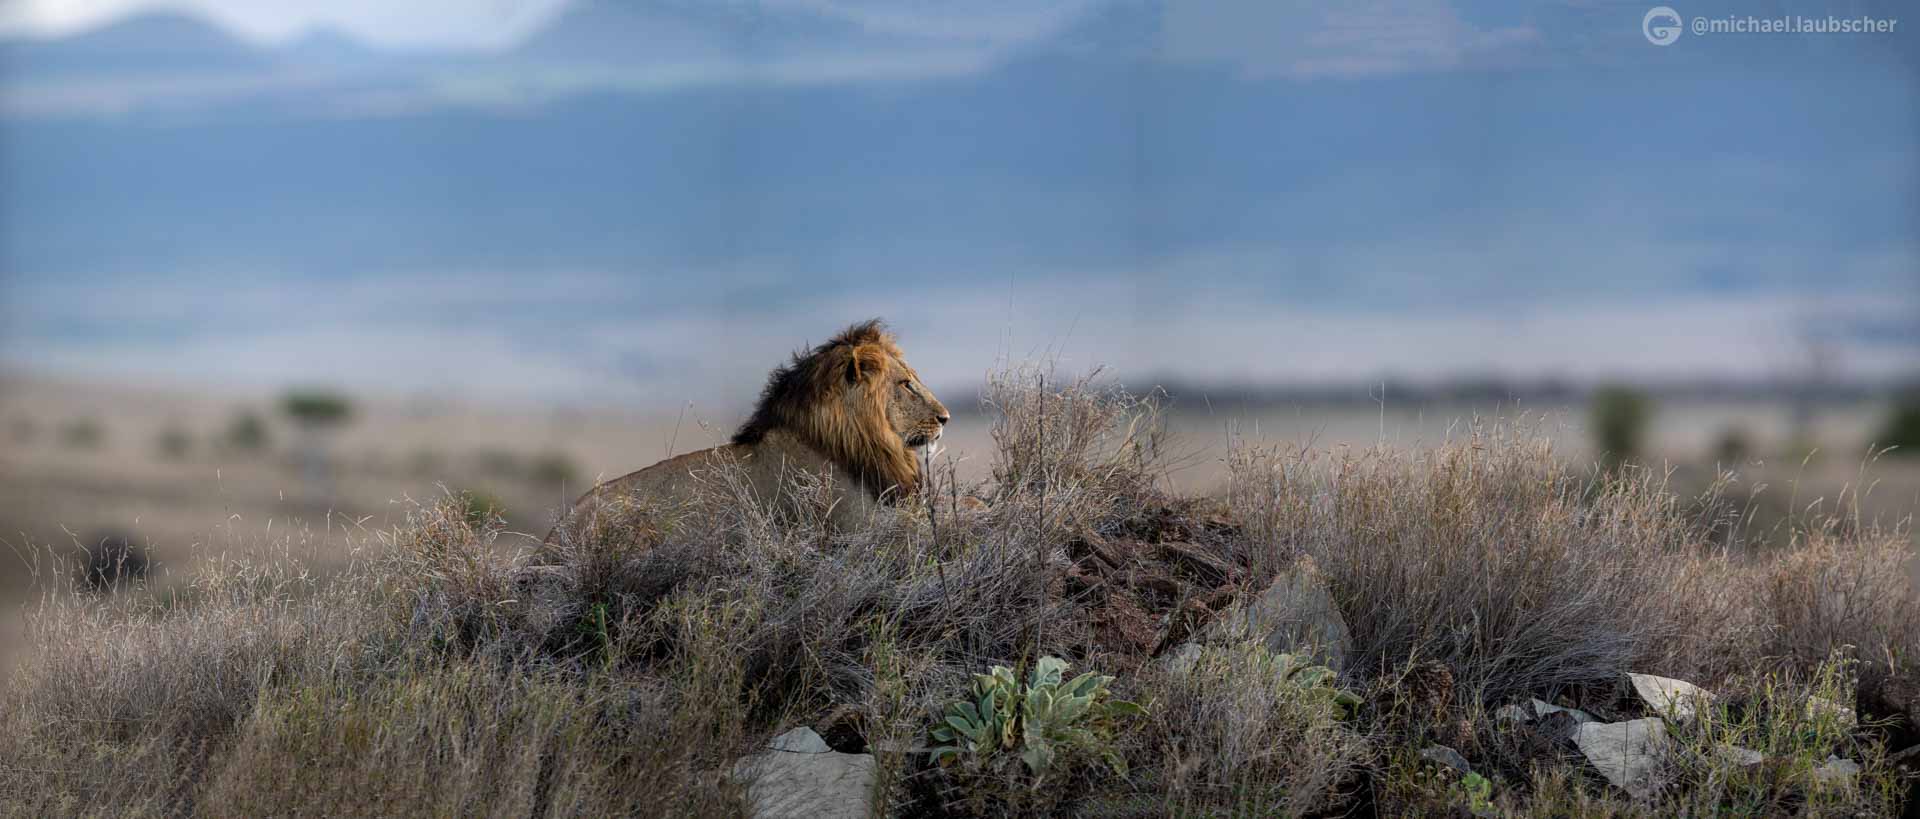
It saves the resulting image back in Lightroom alongside your original images.
As easy as that...
I hope this blog has fuelled your creative juices. Good luck and I look forward to seeing some of your results.
Until then;
Bye bye.
