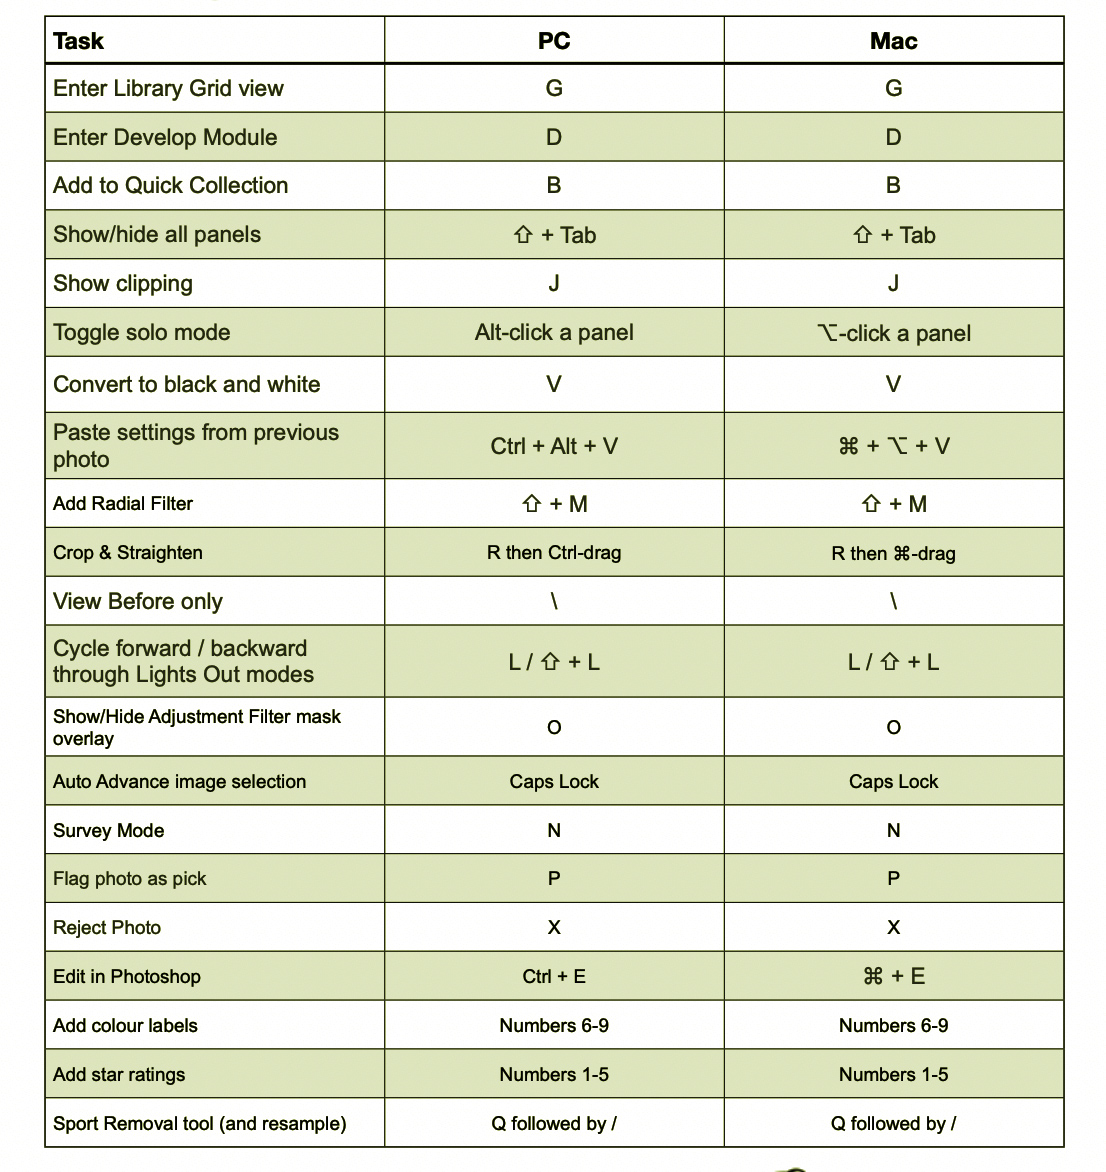
For those of you who have read my blogs until now have probably noticed how much emphasis I put on workflow. The quicker and easier we perfect the workflow the more time we spend editing rather than looking for files or getting bogged down on downloading and sorting etc. On the safaris I have guided, I have had so many people tell me that improving their workflow improves their editing as they feel that they can concentrate so much more on their work as opposed to sorting through hundreds and thousands of files. Now, I have already done a workflow segment on my blog and podcast so this time I'll show you keyboard shortcuts to further speed up your workflow. There are hundreds of shortcuts and I do not want to bore you with them all as they are very easy to find in a simple Google search so rather let me show you the ones I really enjoy using and why. Also, Check out my podcast below on my Lightroom shortcuts!
Let's start with my keys I use for sorting images. Getting rid of the rubbish and sorting good from bad.
G - Switches to Grid Mode or Library Module
D - Switches to Develop Mode
F - Switches to Full Screen on selected image.
X - When in Library or Develop Mode - Rejects/Flags image for deletion
Note: X - When in Crop mode changes orientation from landscape to portrait. Be careful when using X. Don't reject images by accident thinking you're in crop mode.
U - Un-rejects/Un-flags rejected image. If you accidentally hit X on an image to reject it, simply hit U to un-reject it.
Caps Lock/Shift Lock: Automatically selects next image after action is taken.
Numbers 1 -5: Rate images from 1 star to 5 star
P - Pick images. You can pick images as you are going through to flag them and focus on those after you have sorted through your folder. Similar to rating with numbers.
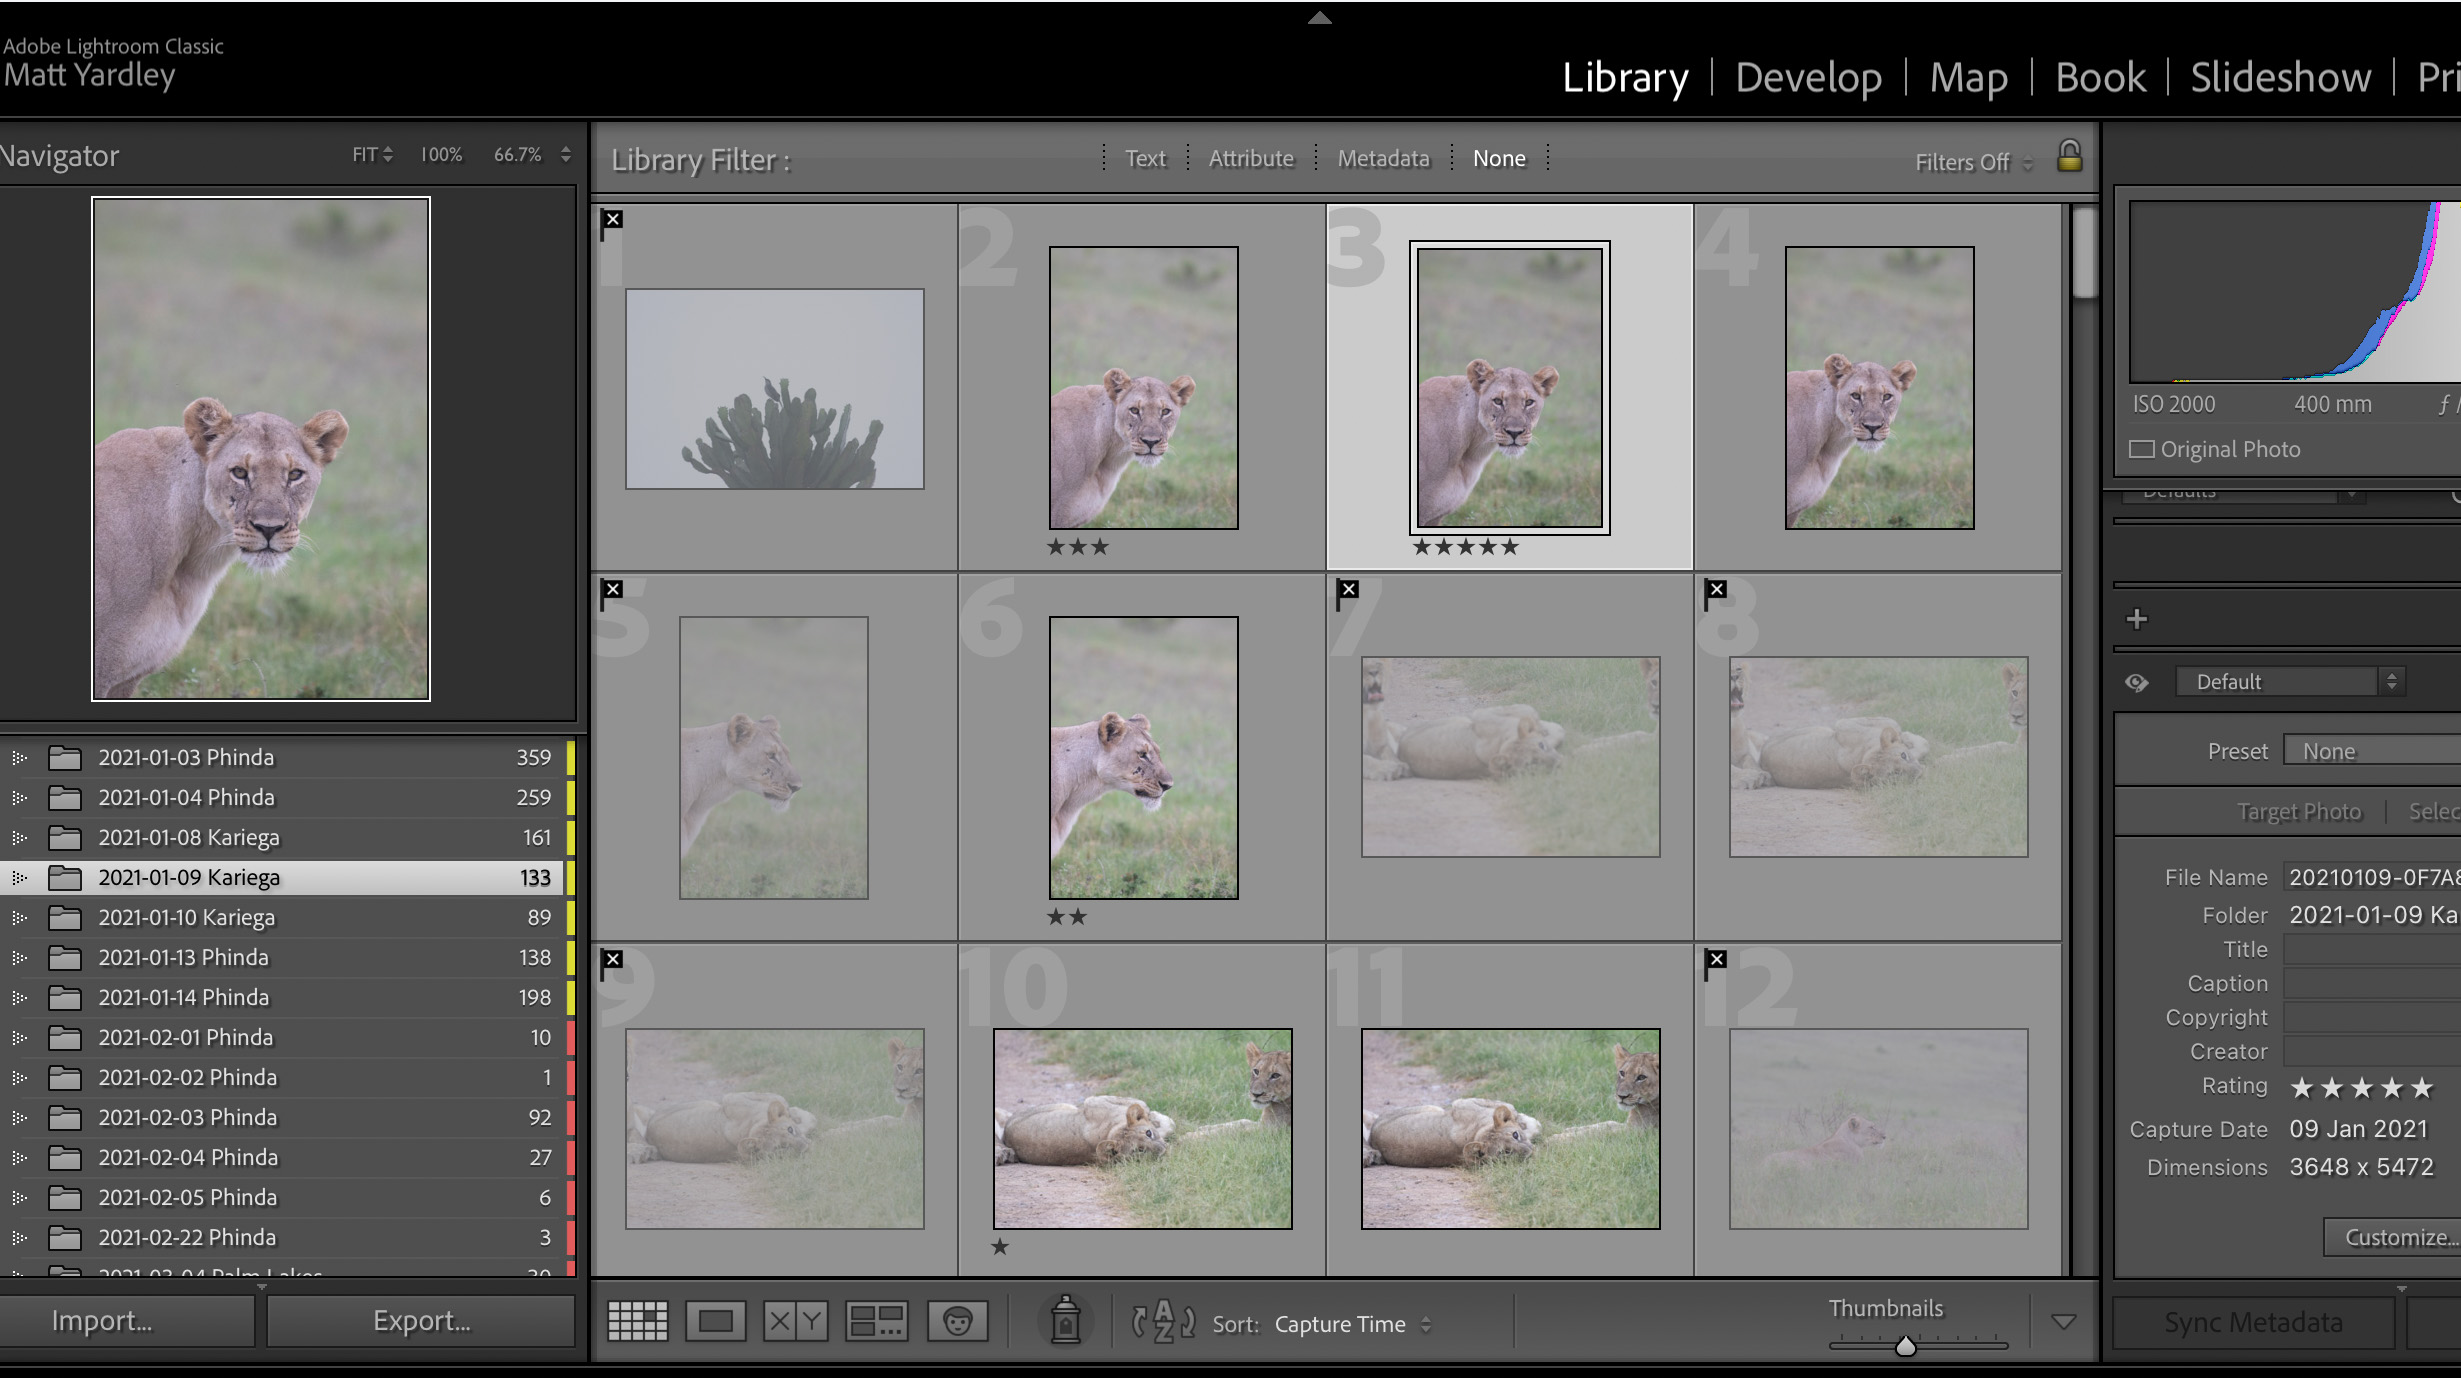
So here is why I always use the above shortcuts. When I want to sort through images in a folder I will select the first one in the Gallery/Library Module. I then hit Caps Lock/Shift Lock and ensure the green light is on. I then hit the F button so the first image is now in full screen.
I then begin to sort my images by simply hitting one of the above keys. If I like an image I will star rate it with the numbers or if I don't like an image I can hit X to reject it later. You can also use the navigation arrows on your keyboard to skip through images if you like. Once done you can exit full screen mode and you will see all of your sorting in the library module.
You can now filter all of your sorting in the Library Module at the top of the panel. Here you can select all your rejected/flagged images or all your 5 star images etc.

Now lets have a look at the editing side of things or when in the Develop Mode...
K - Creates new Brush layer
M - Creates new Linear Gradient Layer
Shift M - Creates new Radial Gradient layer
O - Toggles On/off of the overlay mask whilst tool/mask is selected to help you see the area affected by tool/mask.
H - Hides the mask/tool buttons which clears screen of too many buttons. Don't forget to turn this back on.
R - Crop
B - Send image to target location. If you have created a collection in the library where you want to send your edited images (especially images that will be synced to different platforms like Smugmug, Wix or Lightroom Cloud). To set a collection to 'target collection' then simply right click on the folder created/selected and choose Set Target Collection. Every time you hit B, your edited image will head straight there.
V - Convert to black and white. My favorite!
Two very important ones to help us with over editing while in the develop:
Y - Opens before and after. This compares the original image to ALL of your edits so far
\ - compares your most recent edit to the step before that.
Bonus Tip:
Spot removal: Hit the Q button to open your spot removal tool. If the screen comes up black and white then simply unselect the tick box labelled Visualize Spots at the bottom of the image. Try this little trick out.When you have selected a spot to be removed, hit the H button to hide the white lines of the selected area and source area so you can see the affected area a bit better. Then hit the \ button a few times and Lightroom will find new areas to sample from. You can continue to hit this button until you're happy with the result.
As I say there are hundreds of shortcuts that you can easily find on the net but I really hope these few extra tips gives you that little extra edge on your workflow so that you spend more time playing with the fun stuff. Happy editing :)
Until next time,
Matt

